Granny Square Wall Plant Pocket Free Crochet Pattern
Introduction
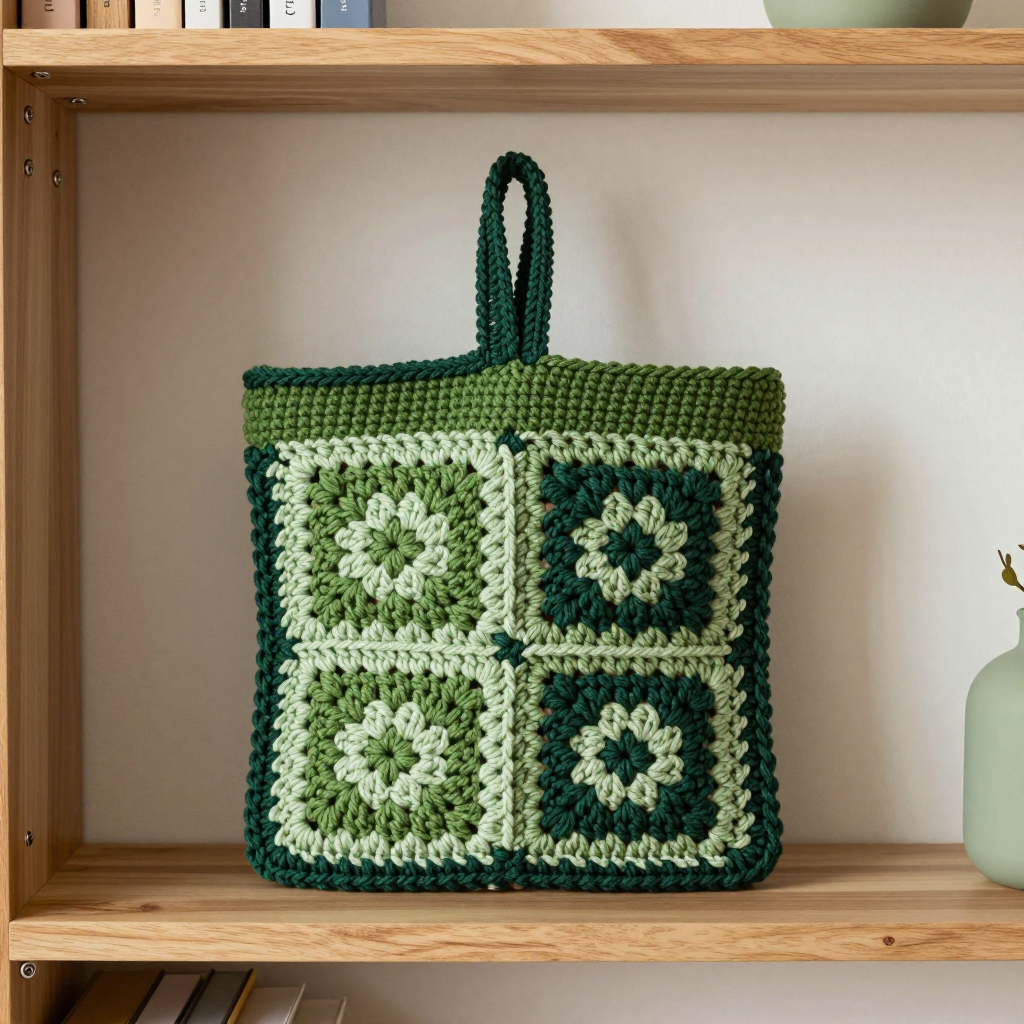
This little wall pocket is the coziest way to bring a bit of green into a small space. It's made from two layered granny squares in soft, plush chenille, joined on three sides so a standard 4 in nursery pot slips in snugly and sits flat against the wall. The moss, sage, and deep forest palette gives it a calm, woodland feel, and the chunky chenille makes it squishy and quick to work up. It's a lovely project for anyone who has crocheted a granny square or two and wants a small, satisfying finish that looks beautiful hanging by a window or beside a desk.
Materials Needed
- Yarn: Super bulky (6) chenille plush, 100% polyester, about 65 yd / 100 g per skein.
- Color A – moss green: 1 skein (about 55 yd)
- Color B – lichen sage: 1 skein (about 45 yd)
- Color C – deep forest: 1 skein (about 20 yd)
- Total used in the sample: about 120 yd
- Hook: 6.0 mm (US J-10)
- Notions: tapestry needle, scissors, stitch marker (optional), a wall hook or nail rated for about 2 lb
- Finished size: 5 in wide x 10 in tall (folded pocket), fits a standard 4 in diameter nursery pot; hanging loop 2 in tall
Abbreviations
- ch – chain
- dc – double crochet
- sc – single crochet
- sl st – slip stitch
- sp – space
- MR – magic ring (adjustable loop)
- rep – repeat
- RS / WS – right side / wrong side
- st(s) – stitch(es)
Gauge
One granny square (4 rounds) = 5 in / 12.5 cm square; 4 dc = 1 in; 2 dc rows = 1 in. Gauge is critical for pot fit, so work one square first and measure it before starting the second.
Tips Before You Start
- Chenille yarn sheds and can be tricky to rip out, so count your clusters as you go and keep your tension relaxed and even.
- Because gauge decides whether the pot fits, check your first square measures 5 in before making the back square.
- Fasten off each color change cleanly and leave generous tails (at least 6 in) so you can weave them securely into the wrong side.
- When joining, work your single crochet loosely so the pocket stays soft and the pot slides in easily.
Step-by-Step Instructions
Notes: work in joined rounds, ch 3 counts as first dc, join with sl st to top of ch 3. Fasten off each color change.
Square 1 (Front – A/B/C)
With A, make a magic ring.
Rnd 1: Ch 3, 2 dc, [ch 2, 3 dc] x3, ch 2, join (12 dc, 4 ch-2 sps).
Rnd 2: Sl st to sp, ch 3, 2 dc, ch 2, 3 dc in same sp, *ch 1, [3 dc, ch 2, 3 dc] in next sp; rep from * x2, ch 1, join (24 dc).
Rnd 3: Change to B, sl st to sp, ch 3, 2 dc, ch 2, 3 dc in same sp, *ch 1, 3 dc in next ch-1 sp, ch 1, [3 dc, ch 2, 3 dc] in next corner sp; rep from * x2, ch 1, 3 dc in next ch-1 sp, ch 1, join (36 dc).
Rnd 4: Change to C, sl st to sp, ch 3, 2 dc, ch 2, 3 dc in same sp, *[ch 1, 3 dc in next ch-1 sp] x2, ch 1, [3 dc, ch 2, 3 dc] in next corner sp; rep from * x2, [ch 1, 3 dc in next ch-1 sp] x2, ch 1, join (48 dc). Fasten off. Square measures 5 in.
Square 2 (Back – B/A/C)
Work as Square 1, but swap A and B in Rnds 1–2 and Rnd 3 respectively; keep C in Rnd 4. Fasten off leaving a 24 in tail.
Join
Hold squares wrong sides together. With C, sc through both layers along the left edge (5 sc), bottom edge (5 sc), and right edge (5 sc) = 15 sc. Do not work the top edge. Fasten off, weave ends.
Top Edge (A)
With RS facing, join A at the top-left corner of the front square.
Row 1: Sc evenly across front top edge (5 sc), sc across back top edge (5 sc) (10 sc).
Row 2: Ch 1, turn, sc in each sc (10).
Row 3: Ch 1, turn, sc in each sc (10). Fasten off. This plain band stiffens the opening.
Hanging Loop (C)
Join C at the center of the top edge back.
Row 1: Ch 12, sl st to same st to form a loop.
Rnd 2: Sc 14 around the loop, join. Fasten off. Loop = 2 in.
Edging (Optional, C)
Sc evenly around the entire outer perimeter of the joined pocket (about 40 sc), working 2 sc in each corner; join, fasten off.
Assembly and Finishing
Weave all ends securely into the wrong side. Block lightly to a 5 in square, being careful not to over-stretch the chenille. Insert a 4 in nursery pot so the pocket back sits flat against the wall, and hang by the loop on a hook or nail rated for about 2 lb.
Pro Tips and Variations
- Swap the color order between the two squares for a different layered look, or work both squares in a single color for a minimalist finish.
- Make a wider version by adding a fifth round to both squares to fit a 5 in pot.
- Use a contrasting edging color or add a small tassel to the bottom corner for extra charm.