Alpine Stitch Plant Pocket Crochet Free Pattern
Introduction
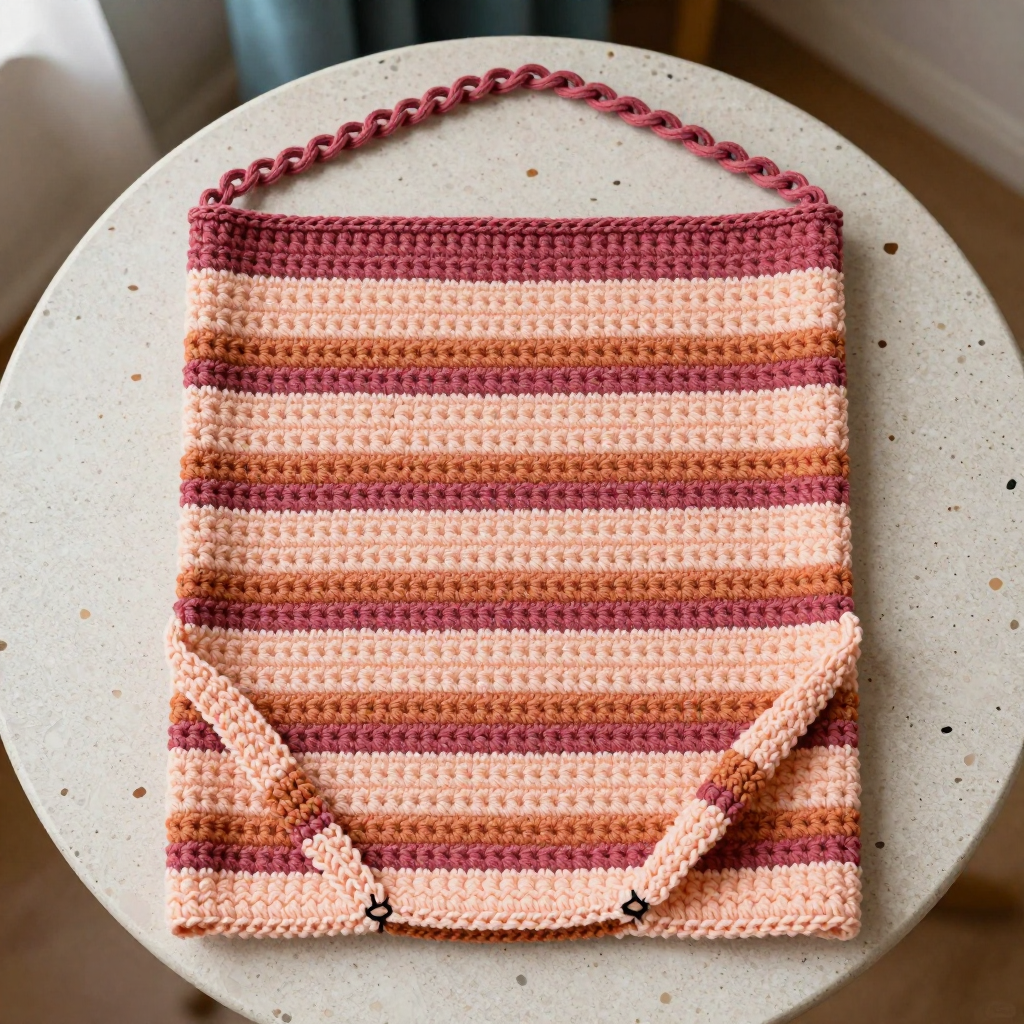
This Alpine Stitch Plant Pocket is a quick, satisfying project for anyone who wants a little handmade texture on their wall. It is beginner-friendly: if you can chain, double crochet, and work a front post double crochet, you can make it. Worked in soft t-shirt yarn with warm peach and apricot stripes, the alpine stitch gives the fabric a raised, nubby surface that looks far more complicated than it is. Folded and stitched at the sides, it becomes a sturdy little pocket that holds a small potted plant or a few dried stems, and the simple chain loop lets you hang it anywhere.
Materials Needed
- Yarn: T-shirt yarn (super bulky, weight category 6), 100% cotton. 1 skein peach (approx 30 yds) and 1 skein apricot (approx 30 yds).
- Hook: 8 mm (US L-11).
- Notions: Tapestry needle for seaming and weaving in ends, scissors, and a stitch marker (optional) for the first stitch of each row.
- Finished size: Approx 6 inches wide x 8 inches tall (15 cm x 20 cm) when folded.
Abbreviations
- ch – chain
- dc – double crochet
- fpdc – front post double crochet: work a double crochet around the post of the stitch below, from front to back, instead of into the top of the stitch
- RS – right side (the front of the fabric)
- rep – repeat
- sl st – slip stitch
- st(s) – stitch(es)
Gauge
8 sts and 6 rows = 4 inches (10 cm) in alpine stitch pattern. Work a small swatch in the pattern and measure the middle of the fabric; if you have more stitches than 8 in 4 inches, go up a hook size, and if you have fewer, go down.
Tips Before You Start
- The ch 3 at the start of every row counts as your first dc, so your first fpdc or dc of the row goes into the next stitch, not the base of the ch 3.
- Alpine stitch alternates a plain dc row with a textured fpdc/dc row. Keep your tension relaxed on the fpdc rows so the raised posts sit evenly.
- Change colors at the end of the last stitch of a row: pull the new color through the final loop, then turn. This keeps the stripe edge neat.
- Before seaming, lay the panel flat and check that the folded-up section reaches about 4 inches (10 cm); adjust the fold slightly if your gauge runs loose or tight.
Step-by-Step Instructions
Pocket (worked flat in alpine stitch)
Row 1 (RS): With peach, ch 21. Dc in 4th ch from hook (skipped 3 ch count as first dc), dc in each ch across, turn. (19 dc)
Row 2: Ch 3 (counts as first dc), fpdc around each dc across, turn. (19 sts)
Row 3: Ch 3, dc in each st across, turn. (19 dc)
Row 4: Ch 3, *fpdc around next st, dc in next st; rep from * to last st, fpdc around last st, turn. (19 sts)
Row 5: Ch 3, dc in each st across, turn. (19 dc)
Rows 6-7: Rep Rows 4-5. Change to apricot at the end of Row 7. (19 sts)
Rows 8-9: Rep Rows 4-5. Change to peach. (19 sts)
Rows 10-11: Rep Rows 4-5. Change to apricot. (19 sts)
Rows 12-13: Rep Rows 4-5. Change to peach. (19 sts)
Rows 14-15: Rep Rows 4-5. Change to apricot. (19 sts)
Rows 16-17: Rep Rows 4-5. Change to peach. (19 sts)
Rows 18-19: Rep Rows 4-5. Change to apricot. (19 sts)
Rows 20-21: Rep Rows 4-5. Change to peach. (19 sts)
Rows 22-23: Rep Rows 4-5. Change to apricot. (19 sts)
Rows 24-25: Rep Rows 4-5. Change to peach. (19 sts)
Fasten off, leaving a long tail for seaming.
Hanging Loop
Loop: With apricot, join yarn to the top right corner of the pocket. Ch 20, sl st to the top left corner to form a loop. Fasten off. Weave in ends.
Assembly and Finishing
Lay the panel flat with the right side facing you. Fold the bottom 4 inches (10 cm) up to the front to form the pocket. Using the long peach tail and a tapestry needle, whipstitch the two side edges together, working through both layers from the bottom fold up to the top of the pocket opening. Secure the yarn with a small knot, then weave in all remaining ends on the wrong side. Gently steam or mist and pat the pocket into shape, and let it dry flat before hanging.
Pro Tips and Variations
- Swap the stripes for a single solid color, or use a self-striping t-shirt yarn for a no-fuss color change.
- Add a small wooden dowel or a twig through the top edge behind the loop for a rustic farmhouse look.
- Make a longer panel (add 2-row repeats) to create a deeper pocket for larger pots, or a shorter one for a phone or mail holder.