Bobble-Stitch Nest Basket Crochet Free Pattern
Introduction
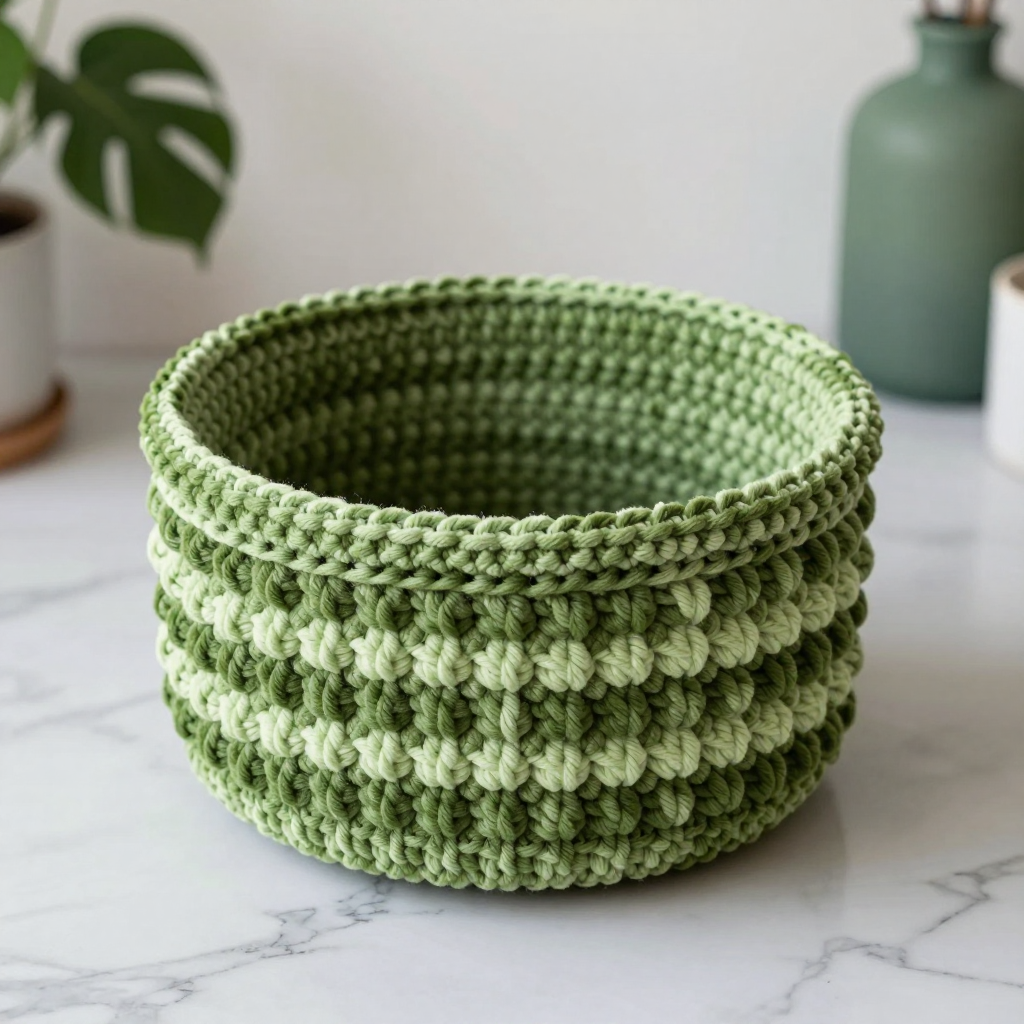
This Bobble-Stitch Nest Basket is the perfect first project for anyone who has mastered single crochet and wants to try something with a little more texture. Worked in plush velvet yarn, it looks like a soft little nest sitting on your shelf, and it feels every bit as dreamy as it looks. The alternating moss and lichen greens give it a gentle, organic feel, while the raised bobbles add just enough interest to keep you smiling as you work. It is a quick, satisfying make that turns a plain nursery pot into a cozy home-decor piece.
Materials Needed
- Yarn: Worsted weight (4) velvet yarn, 100% polyester, 150 yd (137 m) per 100 g skein. Color A (moss): 1 skein (approx. 80 yd used). Color B (lichen): 1 skein (approx. 40 yd used).
- Hook: 5.0 mm (H-8) crochet hook.
- Notions: Stitch marker, tapestry needle, scissors.
- Finished size: Approx. 5.5" (14 cm) diameter at top, 3" (7.5 cm) tall with the edge folded. Fits pots up to 4.5" (11.5 cm) diameter.
Abbreviations
- MR – magic ring: a loop of yarn you crochet into to start a closed circle.
- sc – single crochet.
- dc – double crochet.
- inc – increase: work 2 sc in the same stitch.
- st(s) – stitch(es).
- rnd(s) – round(s).
- blo – back loop only: work into the loop of the stitch farthest from you.
- bobble – 5 dc in the same stitch, remove hook, insert into the first dc, pull the loop through.
Gauge
14 sts and 14 rnds = 4" (10 cm) in single crochet. Work a small swatch in sc and measure a 4" section; if you have more stitches, go up a hook size, and if you have fewer, go down.
Tips Before You Start
- Velvet yarn shows every frogged stitch, so work slowly and count each round before moving on.
- Keep your tension relaxed on the bobble rounds; tight bobbles pull the basket out of shape.
- Use a stitch marker in the first stitch of each round so you never lose your place.
- Work the bobble rounds with a slightly firmer hand than the plain rounds so the bobbles pop forward.
Step-by-Step Instructions
Base (Color A)
Setup: MR, 6 sc into the ring (6 sts).
Rnd 1: inc x6 (12 sts).
Rnd 2: [sc, inc] x6 (18 sts).
Rnd 3: [2 sc, inc] x6 (24 sts).
Rnd 4: [3 sc, inc] x6 (30 sts).
Rnd 5: [4 sc, inc] x6 (36 sts).
Rnd 6: [5 sc, inc] x6 (42 sts).
Rnd 7: [6 sc, inc] x6 (48 sts).
Rnd 8: [7 sc, inc] x6 (54 sts).
Rnd 9: [8 sc, inc] x6 (60 sts).
Rnd 10: [9 sc, inc] x6 (66 sts).
Rnd 11: [10 sc, inc] x6 (72 sts). Do not fasten off.
Sides (Color A)
Rnd 12: sc in blo (72 sts).
Rnds 13-14: sc in both loops (72 sts).
Bobble Pattern
Bobble: 5 dc in the same st, remove hook, insert into the first dc, pull loop through.
Rnd 15 (A): [sc 11, bobble] x6 (72 sts).
Rnds 16-17 (B): sc (72 sts).
Rnd 18 (B): [sc 11, bobble] x6 (72 sts).
Rnds 19-20 (A): sc (72 sts).
Rnd 21 (A): [sc 11, bobble] x6 (72 sts).
Rnds 22-23 (B): sc (72 sts).
Rnd 24 (B): [sc 11, bobble] x6 (72 sts).
Rnds 25-26 (A): sc (72 sts).
Rnd 27 (A): [sc 11, bobble] x6 (72 sts).
Rnd 28 (B): sc (72 sts). Fasten off B.
Top Edge (Color A)
Rnd 29: sc (72 sts).
Rnd 30: [sc 10, inc] x6 (78 sts).
Rnd 31: sc (78 sts).
Rnd 32: [sc 11, inc] x6 (84 sts).
Rnd 33: sc (84 sts). Fasten off. Fold the top edge over to the outside.
Assembly and Finishing
Weave in all ends on the inside of the basket, using the tapestry needle to hide them behind the plain sc rounds. Fold the top edge down over rnds 29-33 so the flare sits against the outside of the basket. Gently steam-block the base flat and shape the sides with your hands; do not press the bobbles flat. Place your pot inside and enjoy.
Pro Tips and Variations
- Swap the two greens for a single color with a contrasting bobble shade for a bolder look.
- Add one more plain round before the top edge to make a slightly taller basket for larger pots.
- Work the bobbles in a smooth cotton while keeping the body in velvet for extra-defined texture.