Victorian Romance Crochet Crossbody Bag Free Pattern
Introduction
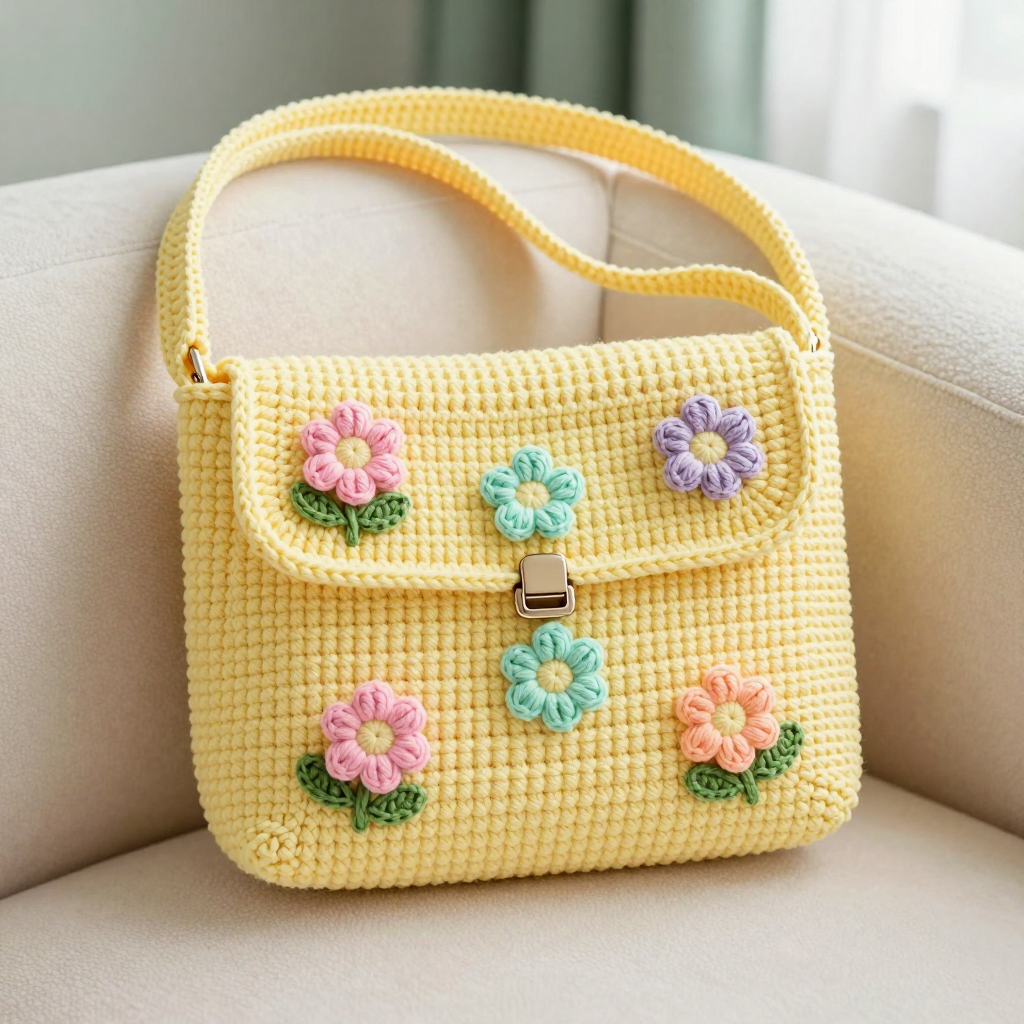
This Victorian Romance crossbody bag is a sweet, beginner-friendly project that turns simple single crochet into something truly charming. It is made from flat rectangles of pastel yellow yarn, then dressed up with candy-colored flowers, mint leaves, and a vintage-style clasp. The finished bag is about 10 inches wide and 8.5 inches tall, with a long narrow strap that lets you wear it across your body. Because every piece is plain single crochet, it is a wonderful first bag project, and the floral embellishments make it feel special and handmade.
Materials Needed
- Yarn: DK weight (3) acrylic yarn. Pastel Yellow (A): 200 yds. Baby Pink (B): 20 yds. Mint Green (C): 20 yds. Lavender (D): 20 yds. Peach (E): 20 yds.
- Hook: 5 mm (US H/8) crochet hook.
- Notions: Tapestry needle for sewing and weaving in ends, scissors, a vintage-style clasp, and sewing thread or matching yarn for attaching the clasp.
- Finished size: Approximately 10 inches wide x 8.5 inches tall, excluding the strap.
Abbreviations
- ch — chain: make a loop of yarn and pull it through the loop on your hook.
- sc — single crochet: insert hook into stitch, yarn over, pull up a loop, yarn over, pull through both loops.
- sl st — slip stitch: insert hook into stitch, yarn over, pull through both the stitch and the loop on your hook.
- st(s) — stitch(es).
- MR — magic ring: an adjustable loop used to start working in the round.
- R — row (worked flat, turning at the end of each row).
Gauge
16 single crochet stitches and 18 rows = 4 inches. To check, crochet a small swatch in single crochet and measure a 4-inch section; if you have more stitches than 16, try a larger hook, and if you have fewer, try a smaller hook.
Tips Before You Start
- Keep your single crochet tension even and relaxed so the bag body and flap lie flat without curling at the edges.
- Count your stitches at the end of every row; each row of the body and flap should always have 40 stitches, and each strap row should have 5.
- Work the flowers and leaves first if you like, so you can arrange them on the bag before sewing and choose the placement you love best.
- Use a tapestry needle and matching yarn to sew the pieces together, and pin the flap and strap in place before stitching so nothing shifts.
Step-by-Step Instructions
Bag Body (Yarn A)
Row 1: Ch 41, sc in 2nd ch from hook and each ch across (40 sts).
Rows 2–38: Ch 1, turn, sc in each st across (40 sts).
Fasten off.
Bag Flap (Yarn A)
Row 1: Ch 41, sc in 2nd ch from hook and each ch across (40 sts).
Rows 2–12: Ch 1, turn, sc in each st across (40 sts).
Fasten off.
Strap (Yarn A)
Row 1: Ch 6, sc in 2nd ch from hook and each ch across (5 sts).
Rows 2–100: Ch 1, turn, sc in each st across (5 sts).
Fasten off.
Flowers (Make 5: one each in B, C, D, E, plus one extra in B)
Rnd 1: Make a magic ring, work 6 sc into the ring (6 sts).
Rnd 2: [Ch 2, sl st in same st] 6 times to create 6 petals.
Fasten off. Repeat to make 5 flowers total.
Leaves (Yarn C)
Row 1: Ch 4, sl st in 2nd ch from hook, sc in next ch, sl st in last ch.
Fasten off. Make as many leaves as you like to scatter among the flowers.
Assembly and Finishing
Place the Bag Flap on top of the Bag Body, aligning the bottom edge of the flap with the top edge of the body. Sew the sides and bottom of the flap to the body, leaving the top edge open. Attach the strap to the sides of the bag at the top corners. Sew the clasp to the center front of the flap. Sew the flowers and leaves randomly on the front of the bag and on the flap. Weave in all ends, then gently block the bag by misting it lightly and shaping it flat to dry so the edges lie smooth.
Pro Tips and Variations
- Swap the pastel yellow for any DK color you love, and choose flower colors that match your wardrobe.
- Add a fabric lining inside the bag for extra strength and a polished finish.
- Make the strap longer or shorter by adding or removing rows in multiples of 5 stitches wide, so it fits you perfectly.