Striped Step Mug Wrap Free Crochet Pattern
Striped Step Mug Wrap Free Crochet Pattern
Introduction
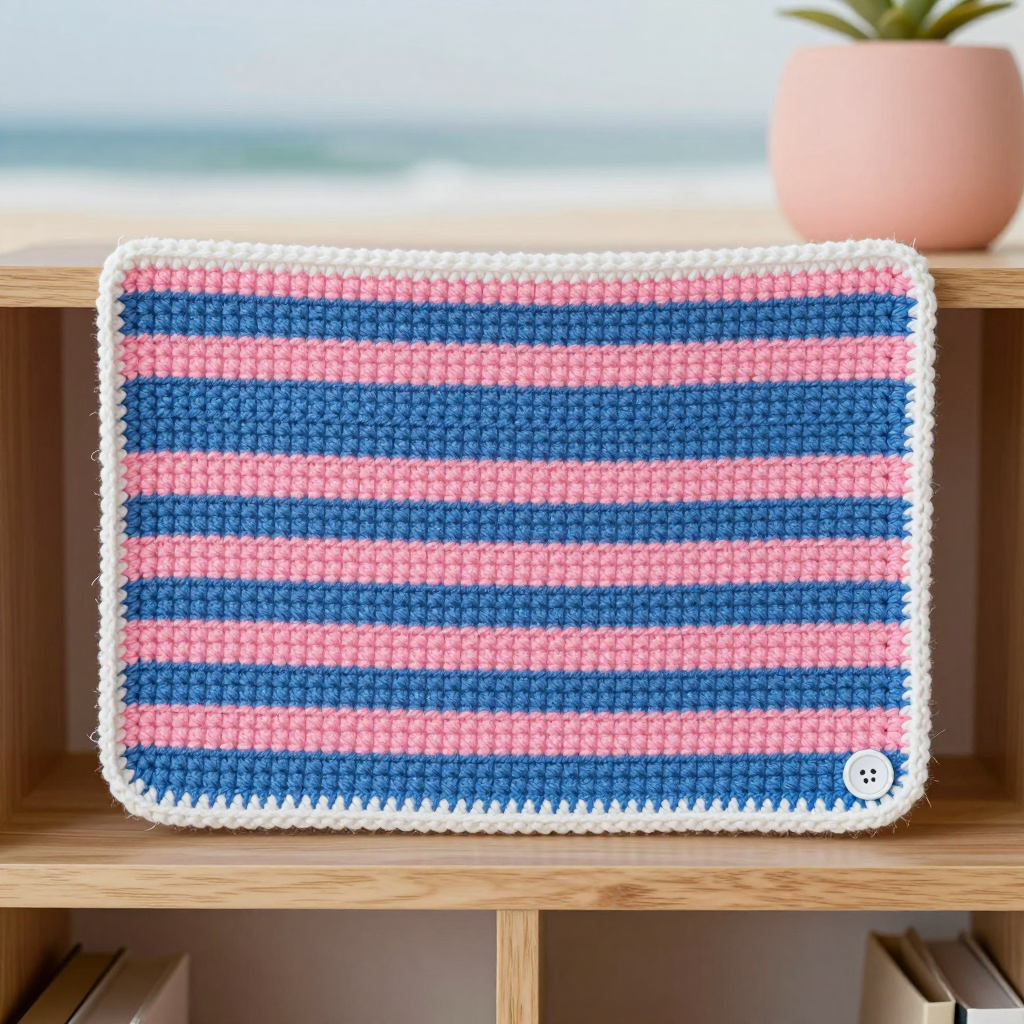
The Striped Step Mug Wrap is a quick, cheerful project made for anyone who wants a satisfying first crochet gift or a fast weekend make. Worked as a simple flat rectangle in single crochet, it uses offset blocks of cotton candy pink and baby blue to create a crisp, geometric art deco look. The dense single crochet fabric feels smooth and sturdy in the hand, and the white contrasting edging frames the stripes like a picture frame. Wrapped around a standard mug and fastened with a single button, it keeps drinks warm and looks lovely sitting on a desk or kitchen shelf.
Materials Needed
- Yarn: Worsted weight (4) cotton yarn. Approximately 30 yards of pink (Color A), 30 yards of blue (Color B), and 10 yards of a contrasting color (Color C, sample uses white).
- Hook: 6 mm (US J/10) crochet hook.
- Notions: Tapestry needle for weaving in ends, scissors, and one 1-inch button.
- Finished size: Approximately 11 inches long x 3 inches wide (flat). Fits a standard mug with a 3.5 inch diameter.
Abbreviations
- ch — chain: make a loop of yarn and pull it through the loop on your hook.
- sc — single crochet: insert hook into stitch, yarn over, pull up a loop, yarn over, pull through both loops.
- sl st — slip stitch: insert hook into stitch, yarn over, pull through both the stitch and the loop on your hook.
- st(s) — stitch(es).
- A, B, C — Color A (pink), Color B (blue), Color C (contrast/white).
Gauge
20 sts and 17 rows = 4 inches in the sc, ch-1 pattern. To check, crochet a small swatch in single crochet and measure a 4-inch section; adjust your hook size if your stitches are much larger or smaller than this.
Tips Before You Start
- Count your stitches at the end of every row — you should always have 55 sc. Losing or adding a stitch will make the rectangle bow.
- Keep your turning chain tight (ch 1 only) so the side edges stay straight and even.
- Leave 4–6 inch tails when you fasten off each color block; they make weaving in much easier and keep the color changes secure.
- Cotton yarn has little stretch, which is perfect here — it holds the wrap snugly around the mug without sagging.
Step-by-Step Instructions
Main Rectangle
Base chain: With A, ch 56.
Row 1: Sc in 2nd ch from hook and in each ch across, turn. (55 sc)
Rows 2–3: Ch 1, sc in each st across, turn. (55 sc) Fasten off A.
Row 4: Join B, ch 1, sc in each st across, turn. (55 sc)
Rows 5–6: Ch 1, sc in each st across, turn. (55 sc) Fasten off B.
Rows 7–9: Join A, ch 1, sc in each st across, turn. (55 sc) Fasten off A.
Rows 10–12: Join B, ch 1, sc in each st across, turn. (55 sc) Fasten off B.
Rows 13–15: Join A, ch 1, sc in each st across, turn. (55 sc) Fasten off A.
Rows 16–18: Join B, ch 1, sc in each st across, turn. (55 sc) Fasten off B.
Rows 19–21: Join A, ch 1, sc in each st across, turn. (55 sc) Fasten off A.
Rows 22–24: Join B, ch 1, sc in each st across, turn. (55 sc) Fasten off B.
Rows 25–27: Join A, ch 1, sc in each st across, turn. (55 sc) Fasten off A.
Rows 28–30: Join B, ch 1, sc in each st across, turn. (55 sc) Fasten off B.
Rows 31–33: Join A, ch 1, sc in each st across, turn. (55 sc) Fasten off A.
Rows 34–36: Join B, ch 1, sc in each st across, turn. (55 sc) Fasten off B.
You now have 12 stripes of 3 rows each, starting and ending with pink.
Edging
Edging: Join C to any corner, ch 1, sc evenly around the entire piece, working 3 sc in each corner. Join with sl st to first sc. Fasten off.
Button Closure
Button: Sew a 1-inch button at one short end, centered, 0.5 inch from the edge. Use the natural spaces between stitches on the opposite end as buttonholes.
Assembly and Finishing
There is no seaming required — the wrap is a single flat rectangle. Weave in all ends on the wrong side, threading each tail through several stitches in its own color so it disappears. Block the piece lightly by misting it with water and pinning it flat to an 11 x 3 inch rectangle; let it dry completely so the edges lie straight and the stripes stay crisp. Once dry, sew on the button if you haven't already, and test the wrap around your mug to confirm the button sits comfortably through the stitch spaces.
Pro Tips and Variations
- Swap the pink and blue for any two colors you love — a monochrome pair or a bold contrast both look great with the white edging.
- Make the stripes wider by working 4 or 5 rows per color block instead of 3; just keep the total row count even so the wrap still fits.
- For a more secure closure, crochet a small ch-8 loop at one end instead of relying on stitch spaces, then sew the button to the opposite end.