Checkerboard Puff Bike Seat Cover: Free Crochet Pattern
Introduction
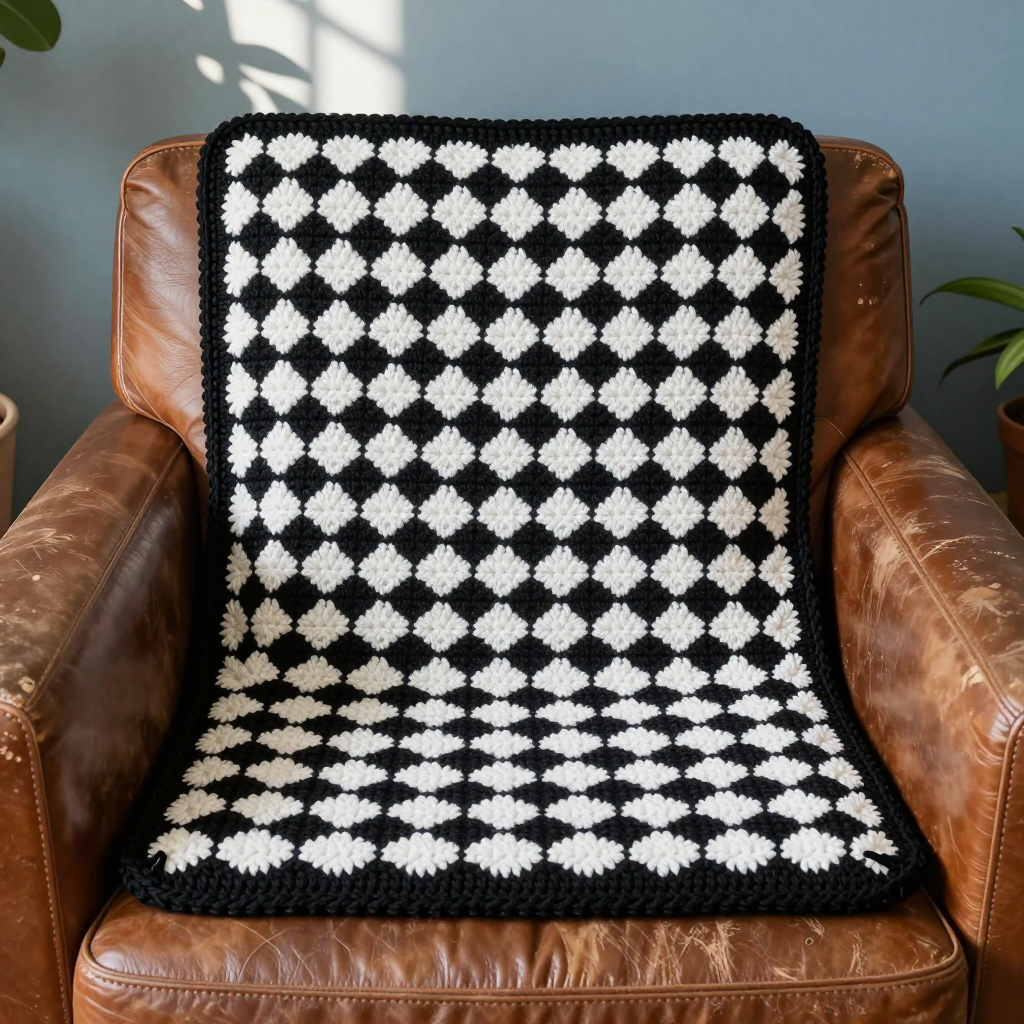
This checkerboard puff bike seat cover is a cozy little upgrade for anyone who wants their ride to feel a bit softer and a lot more stylish. It's designed for crocheters who are comfortable with basic stitches and ready to try puff stitch, worked flat in simple rows with a clever stepped taper at one end. The bulky black and white wool creates a raised, bumpy grid that looks like a woven checkerboard and feels plush under you. With an elastic threaded through the edging, it hugs the seat snugly and stays put on autumn commutes and weekend rides.
Materials Needed
- Yarn: Bulky weight (weight category 5) wool, approx. 100 g total: 50 g black (Color A) and 50 g white (Color B).
- Hook: 6.0 mm (US J-10) crochet hook.
- Notions: Yarn needle, scissors, tape measure, 20 inches (50 cm) of thin elastic cord.
- Finished size: Approx. 10 inches (25 cm) long x 8 inches (20 cm) wide, stretching to fit seats up to 12 x 9 inches (30 x 23 cm).
Abbreviations
- ch – chain
- st(s) – stitch(es)
- sp(s) – space(s)
- sk – skip
- sc – single crochet
- dc – double crochet
- sl st – slip stitch
- puff st – puff stitch: yarn over, insert hook in the indicated space, yarn over, pull up a loop (3 loops on hook); repeat this 3 more times in the same space (9 loops on hook), yarn over, pull through all loops on hook, ch 1 to close.
- RS – right side
- rep – repeat
Gauge
4 puff stitches and 4 rows = 4 inches (10 cm) in puff stitch pattern. Work a small swatch and measure a 4-inch section; if your puffs are larger, go down a hook size, and if smaller, go up.
Tips Before You Start
- Keep your puff stitches loose and even so the raised grid stays flat and doesn't pucker.
- Always change color on the last stitch of the row so the new band starts cleanly.
- Count your puffs at the end of every row — each full row should have 10 puffs.
- Try the cover on the seat before tying the elastic so you can adjust the tension.
Step-by-Step Instructions
Main Body (worked flat in rows)
With A, ch 21.
Row 1 (RS): Puff st in 4th ch from hook (counts as first puff), *ch 1, sk next ch, puff st in next ch; rep from * to last ch, ch 1, sk last ch, dc in last ch. Turn. (10 puffs, 10 ch-1 sps)
Row 2: Ch 3 (counts as dc), *puff st in next ch-1 sp, ch 1; rep from * across, ending with dc in last st. Turn. (10 puffs)
Rows 3-4: Rep Row 2. (10 puffs)
Change to B.
Rows 5-8: Rep Row 2. (10 puffs)
Change to A.
Rows 9-12: Rep Row 2. (10 puffs)
Change to B.
Rows 13-16: Rep Row 2. (10 puffs)
Change to A.
Rows 17-20: Rep Row 2. (10 puffs)
Change to B.
Rows 21-24: Rep Row 2. (10 puffs)
Change to A.
Rows 25-28: Rep Row 2. (10 puffs)
Change to B.
Rows 29-32: Rep Row 2. (10 puffs)
Change to A.
Rows 33-36: Rep Row 2. (10 puffs)
Change to B.
Rows 37-40: Rep Row 2. (10 puffs)
Do not fasten off.
Shape for Seat (short rows)
Row 41: Ch 3, puff st in next ch-1 sp, ch 1, [puff st in next ch-1 sp, ch 1] 6 times, dc in next st. Turn. (8 puffs)
Row 42: Ch 3, puff st in next ch-1 sp, ch 1, [puff st in next ch-1 sp, ch 1] 5 times, dc in last st. Turn. (7 puffs)
Row 43: Ch 3, puff st in next ch-1 sp, ch 1, [puff st in next ch-1 sp, ch 1] 4 times, dc in last st. Turn. (6 puffs)
Row 44: Ch 3, puff st in next ch-1 sp, ch 1, [puff st in next ch-1 sp, ch 1] 3 times, dc in last st. Turn. (5 puffs)
Row 45: Ch 3, puff st in next ch-1 sp, ch 1, [puff st in next ch-1 sp, ch 1] 2 times, dc in last st. Turn. (4 puffs)
Row 46: Ch 3, puff st in next ch-1 sp, ch 1, puff st in next ch-1 sp, ch 1, dc in last st. Turn. (3 puffs)
Row 47: Ch 3, puff st in next ch-1 sp, ch 1, dc in last st. Turn. (2 puffs)
Row 48: Ch 3, puff st in next ch-1 sp, dc in last st. Turn. (1 puff)
Fasten off.
Edging and Elastic
With RS facing, join A with sc in corner of Row 1, work sc evenly around entire outer edge, working 1 sc in each st and 1 sc in each ch-1 sp along sides, and 2 sc in each corner. Join with sl st to first sc. Fasten off.
Cut elastic to 20 inches (50 cm). Using yarn needle, thread elastic through sc edging, leaving ends free. Try cover on seat, adjust elastic tension, and tie ends securely.
Assembly and Finishing
There are no seams to sew on this cover — the body is worked in one flat piece. Weave in all yarn ends on the wrong side, taking care to hide the color changes. Thread the elastic through the edging as described, fit the cover to your seat, and tie the elastic ends. Lightly steam or mist block the cover to flatten the puffs and even out the edges, then let it dry fully before use.
Pro Tips and Variations
- Swap the black and white for two earthy tones like charcoal and oatmeal for a softer Japandi look.
- Add a second row of sc around the edging for extra durability on high-wear seats.
- Use a slightly thicker elastic or a drawstring cord if you want a tighter, more secure fit.