Free Pattern: Retro Circle Motif Crochet Zipper Pouch
Introduction
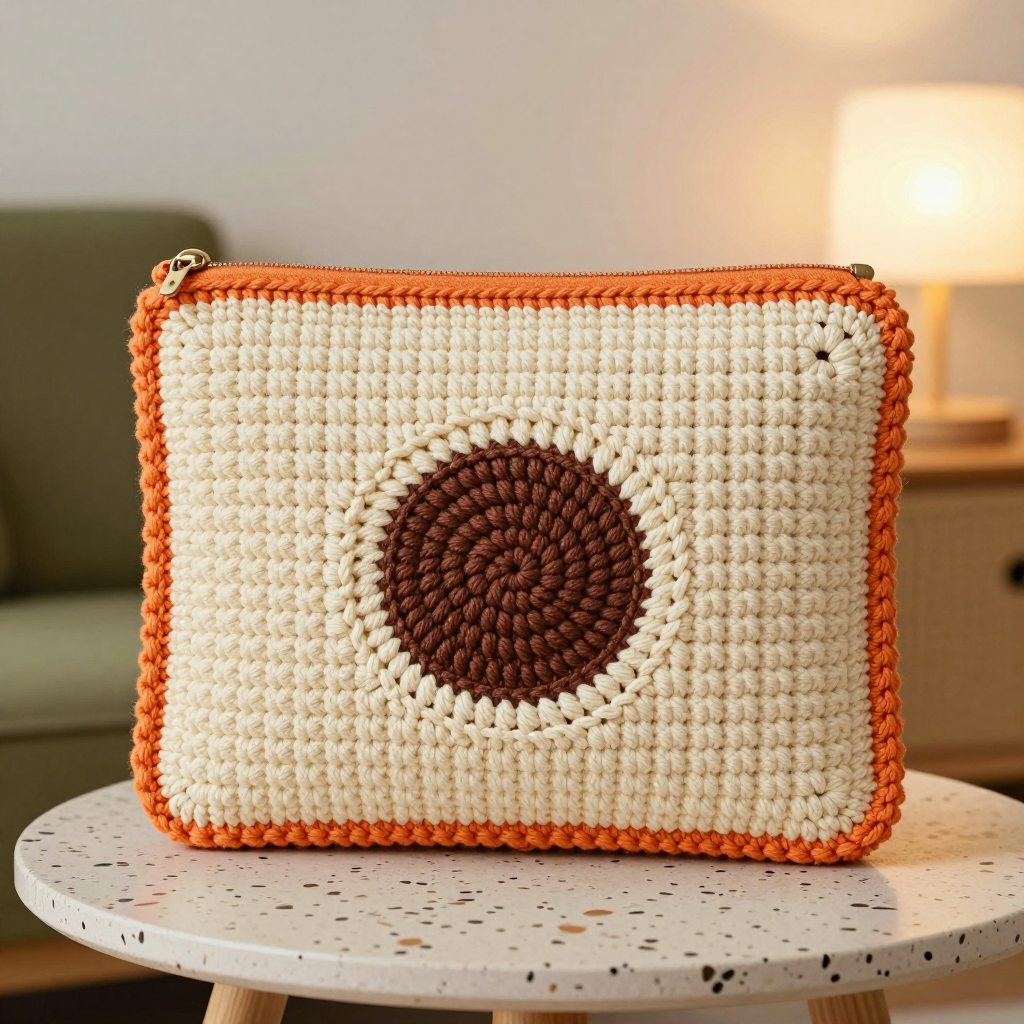
This little zipper pouch is the perfect project for anyone who loves a clean, mid-century modern look but wants to keep their stitches simple. Worked entirely in single crochet, it comes together as two flat cream panels with a bold brown circle appliquéd on the front and a bright orange border framing the whole thing. At about 6 inches wide by 4.5 inches tall, it is just right for hooks, stitch markers, makeup, or small treasures. The finished pouch feels sturdy and smooth, with a crisp zipper finish that makes it look far more complicated than it really is.
Materials Needed
- Yarn: Worsted weight (category 4) acrylic yarn — cream (A) 80 yards, orange (B) 40 yards, brown (C) 20 yards
- Hook: 4 mm (G-6) crochet hook
- Notions: Tapestry needle, matching sewing thread, sewing needle, 7-inch zipper, scissors, pins
- Finished size: 6 inches wide x 4.5 inches tall (excluding zipper tab)
Abbreviations
- ch — chain: make a loop of yarn and pull it through the loop on your hook.
- sc — single crochet: insert hook into stitch, yarn over, pull up a loop, yarn over, pull through both loops.
- inc — increase: work 2 single crochet stitches into the same stitch.
- sl st — slip stitch: insert hook into stitch, yarn over, pull through both the stitch and the loop on your hook.
- MR — magic ring: an adjustable loop used to start working in the round.
- st(s) — stitch(es)
- Rnd — round: a complete circle of stitches worked in the round.
Gauge
16 stitches and 18 rows = 4 inches in single crochet. To check, crochet a small swatch in single crochet and measure a 4-inch section; adjust your hook size if you have more or fewer stitches than 16 per 4 inches.
Tips Before You Start
- Keep your single crochet tension even and slightly firm so the pouch holds its flat, structured shape.
- Make both panels before starting assembly so you can match their size exactly.
- When working the edging, space your stitches evenly along the sides so the border lies flat and does not ripple.
- Pin the zipper in place before sewing so the tape stays aligned with the top edge.
Step-by-Step Instructions
Pouch Body — make 2 (A)
Row 1: Ch 25, sc in 2nd ch from hook and each ch across (24 sts).
Rows 2–20: Ch 1, turn, sc in each st across (24 sts).
Fasten off. Make a second identical panel.
Circle Appliqué (C)
Rnd 1: MR, 6 sc into ring (6 sts).
Rnd 2: inc x6 (12 sts).
Rnd 3: [sc, inc] x6 (18 sts).
Rnd 4: [2 sc, inc] x6 (24 sts).
Rnd 5: [3 sc, inc] x6 (30 sts).
Fasten off, leaving a long tail for sewing.
Assembly of Panels
Place the two cream panels together with wrong sides facing. Join A at a corner and sc evenly around the outer edge through both layers, working 3 sc in each corner, then join with sl st to the first sc. Fasten off.
Edging (B)
With right side facing, join B at the top right corner of the pouch. Work sc evenly around the entire outer edge, working 3 sc in each corner. Join with sl st to the first sc. Fasten off.
Zipper
Pin the 7-inch zipper to the top edge of the pouch, aligning the zipper tape with the edge. Sew the zipper in place using matching thread.
Assembly and Finishing
Center the brown circle on the front of the pouch, 1 inch below the top edge, and sew it in place using the long tail. Weave in all ends securely. Block lightly if desired by misting with water and shaping flat to dry.
Pro Tips and Variations
- Swap the brown circle for a mustard yellow or teal one to change the retro color story.
- Add a small fabric lining before sewing in the zipper for a more polished interior.
- Attach a short wrist strap or key ring to one side for a handy little carry pouch.