Fairycore V-Stitch Earphone Case Free Crochet Pattern
Introduction
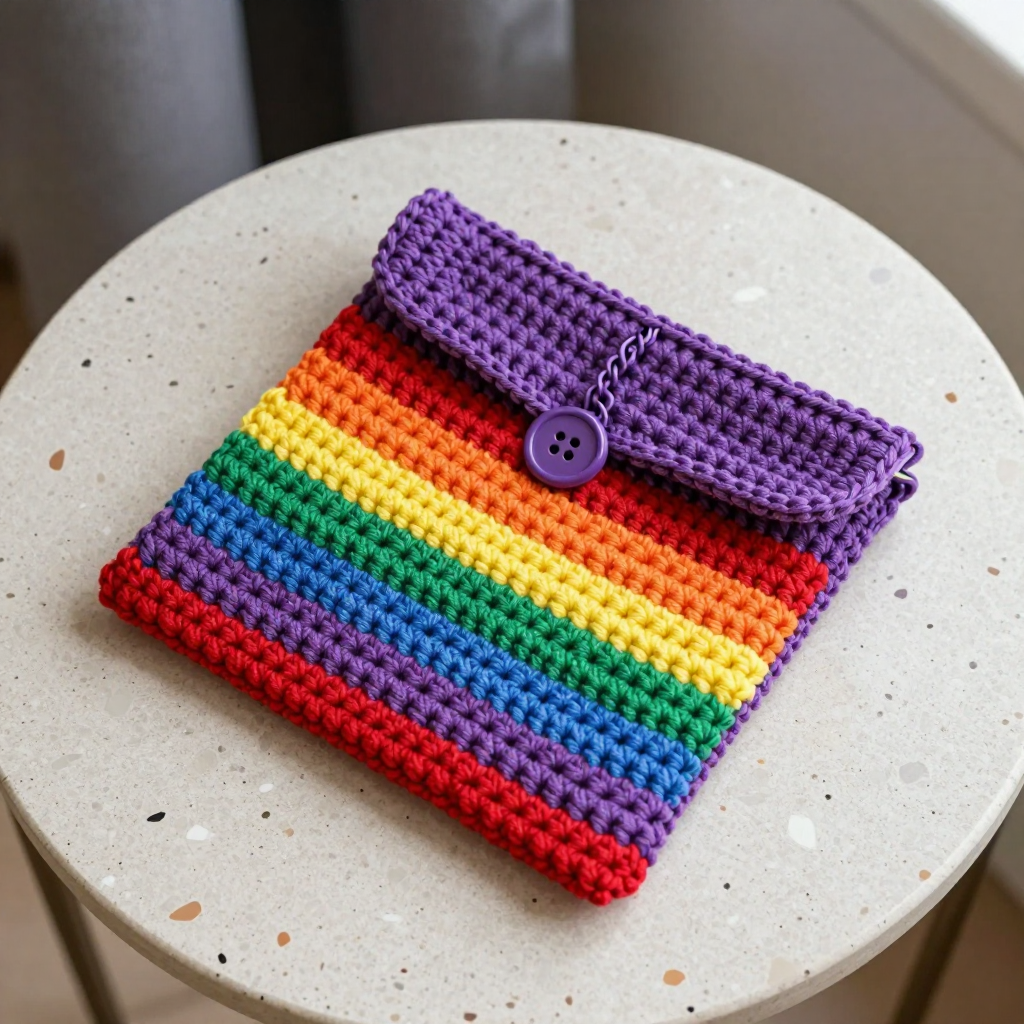
This tiny rainbow earphone case is the perfect first project for anyone who wants to try v-stitch without committing to a big blanket. Worked in bright worsted weight cotton stripes, it comes together as two small flat squares that are joined into a simple pocket with a button flap. The v-stitch gives it a lovely textured, slightly lacy look, while the cotton keeps it sturdy enough to toss into a gym bag. Clip it to your bag and your earbuds will always be right where you left them.
Materials Needed
- Yarn: Worsted weight cotton yarn, approx. 50 yds total, in six colors (red, orange, yellow, green, blue, purple), approx. 8 yds of each.
- Hook: 4.0 mm (US G-6).
- Notions: Tapestry needle, scissors, one small button (approx. 1/2 inch / 12 mm), one small swivel clip.
- Finished size: Approx. 3 inches (7.5 cm) wide x 3.5 inches (9 cm) tall including the flap.
Abbreviations
- ch – chain: yarn over and pull through the loop on your hook.
- dc – double crochet: yarn over, insert hook in stitch, pull up a loop, yarn over and pull through two loops twice.
- V-st – v-stitch: [dc, ch 1, dc] all worked into the same stitch or space.
- sc – single crochet: insert hook in stitch, pull up a loop, yarn over and pull through both loops.
- sl st – slip stitch: insert hook in stitch, yarn over and pull through both the stitch and the loop on your hook.
- sk – skip: miss the stated number of chains or stitches.
- sp – space: the chain-1 space inside a v-stitch.
- st(s) – stitch(es).
- rep – repeat.
Gauge
4 v-stitches and 4 rows = 2 inches (5 cm) in pattern. Work a small swatch in v-stitch and measure a 2-inch section; if your stitches are bigger, go down a hook size, and if smaller, go up.
Tips Before You Start
- Keep your turning chains loose so the side edges of each panel stay straight and easy to join later.
- Change colors on the last pull-through of the final dc of a row so the new stripe starts cleanly.
- Work both panels with the same tension so they match in size before joining.
- Cotton has little stretch, so don't pull the joining sc too tightly or the case will pucker.
Step-by-Step Instructions
Panel (make 2)
With red, ch 13.
Row 1: V-st in 4th ch from hook, sk 2 ch, [dc, ch 1, dc] in next ch across, dc in last ch. (5 V-st, 2 dc)
Row 2: Ch 3, turn, V-st in each ch-1 sp across, dc in top of turning ch. (5 V-st, 2 dc)
Rows 3-4: Rep Row 2. Change to orange. (5 V-st, 2 dc)
Rows 5-6: Rep Row 2. Change to yellow. (5 V-st, 2 dc)
Rows 7-8: Rep Row 2. Change to green. (5 V-st, 2 dc)
Rows 9-10: Rep Row 2. Change to blue. (5 V-st, 2 dc)
Rows 11-12: Rep Row 2. Change to purple. (5 V-st, 2 dc)
Rows 13-14: Rep Row 2. Fasten off. (5 V-st, 2 dc)
Flap
With purple, join yarn to top right corner of one panel (right side facing).
Row 1: Ch 3, V-st in each ch-1 sp across, dc in last st. (5 V-st, 2 dc)
Row 2: Ch 3, turn, V-st in each ch-1 sp across, dc in last st. (5 V-st, 2 dc)
Row 3: Ch 1, turn, sc in each st across. (12 sc) Fasten off.
Button Loop
With purple, join yarn to center of flap Row 3, ch 6, sl st in same st to form loop. Fasten off.
Assembly
Place panels wrong sides together. Join with sc evenly around 3 sides (bottom and two sides), working through both layers. Fasten off. Weave in ends.
Button
Sew button to front panel centered, opposite button loop.
Edging (optional)
With any color, sc evenly around entire outer edge of case and flap. Fasten off.
Clip
Attach small swivel clip to top corner of case.
Assembly and Finishing
After joining the panels on three sides, weave in all ends on the wrong side of the work, tucking them through a few stitches so they stay put. Sew the button firmly through both layers of the front panel so it doesn't pull loose. If you worked the optional edging, smooth it flat with your fingers. Lightly steam or wet-block the finished case into a neat rectangle and let it dry fully before attaching the swivel clip.
Pro Tips and Variations
- Swap the rainbow stripes for two colors to make a quicker, more minimal case.
- Use a contrasting color for the edging to frame the stripes and hide any uneven side edges.
- Add a second button loop or a longer chain loop if you want to hang the case from a lanyard.


