Fairycore Cherry Blossom Charm Free Crochet Pattern
Introduction
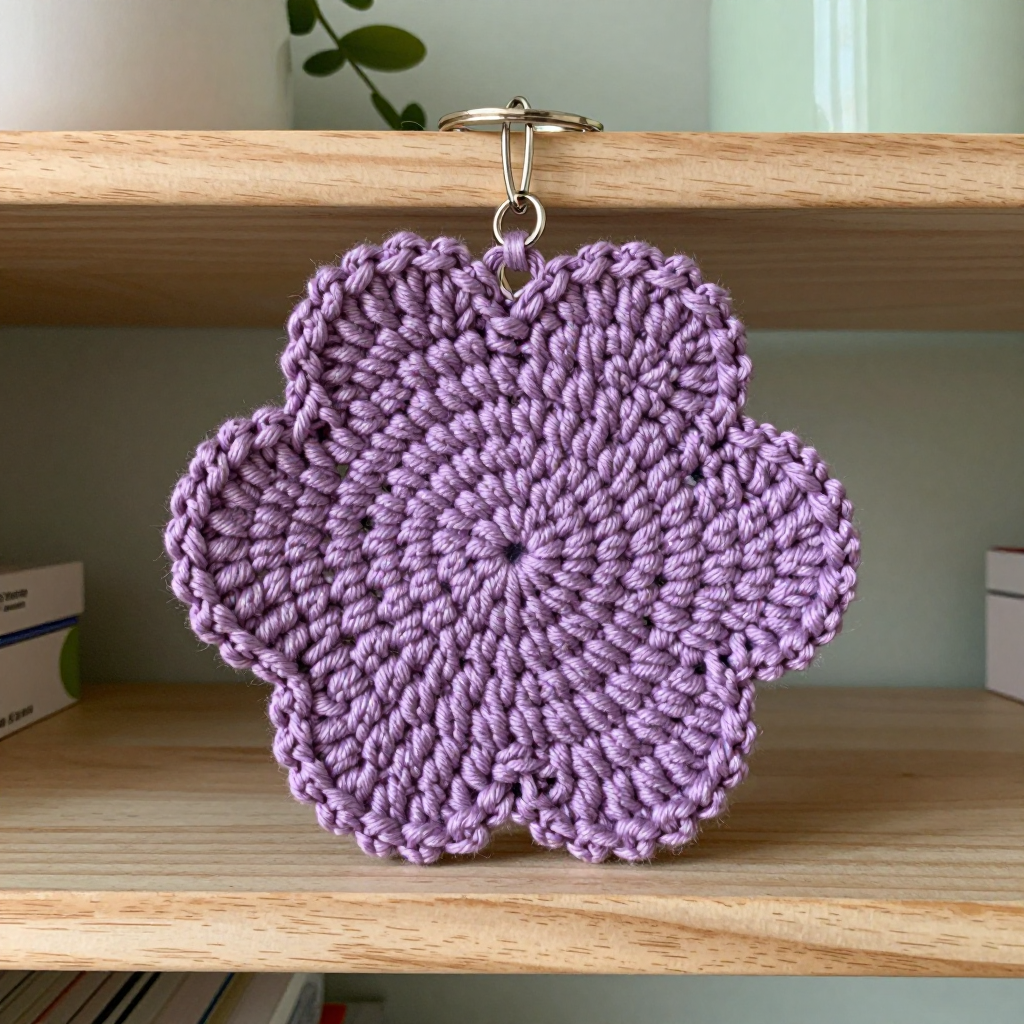
This little fairycore cherry blossom charm is the perfect small project for anyone who loves textured, dimensional crochet without committing to a full blanket or garment. It is made from a flat plum center circle surrounded by a raised, ribbed ring of mauve petals worked in front and back post stitches, then finished with a delicate chain-loop edging. At about 2.5 inches (6.5 cm) across, it looks like a tiny blossom plucked from a fairy garden and feels soft, squishy, and satisfying in the hand. Clip it to your keys, a bag, or a journal and carry a little spring with you everywhere.
Materials Needed
- Yarn: Aran weight wool blend (for example 50% wool, 50% acrylic) — approximately 10 yards (9 m) mauve and 5 yards (4.5 m) plum.
- Hook: 4.0 mm (US G-6).
- Notions: Stitch marker, tapestry needle, scissors, and one keyring (split ring or lobster clasp, about 1 inch / 2.5 cm).
- Finished size: Approximately 2.5 inches (6.5 cm) in diameter, excluding the keyring.
Abbreviations
- MR — magic ring: an adjustable loop you crochet into to start a circle with no hole.
- sc — single crochet.
- dc — double crochet.
- inc — increase: work 2 single crochet into the same stitch.
- Fpdc — front post double crochet: work a double crochet around the post of the stitch below, from the front, so it pops forward.
- Bpdc — back post double crochet: work a double crochet around the post of the stitch below, from the back, so it sits behind.
- ch — chain.
- sl st — slip stitch.
- st(s) — stitch(es).
- rnd(s) — round(s).
Gauge
16 sts and 16 rnds = 4 inches (10 cm) in single crochet. To check, crochet a small flat swatch in sc and measure a 4-inch section; adjust your hook size if you have noticeably more or fewer stitches than 16.
Tips Before You Start
- Keep your tension even on the post stitches — front and back post dc should be worked snugly around the post, not pulled tight, or the ribbing will pucker.
- Use a stitch marker in the first stitch of each round; post stitch rounds can hide the round join.
- Work the center circle firmly so the plum center stays flat and does not dome under the petals.
- Leave a 6-inch tail on the mauve yarn when you fasten off — you will use it to attach the keyring neatly.
Step-by-Step Instructions
Center (Plum)
Rnd 1: MR, 6 sc into the ring (6 sts). Pull the ring closed.
Rnd 2: inc in each st around (12 sts).
Rnd 3: [sc, inc] x6 (18 sts).
Rnd 4: [2 sc, inc] x6 (24 sts). Fasten off plum, leaving a short tail to weave in.
Petals (Mauve)
Rnd 5: Join mauve with a sl st to any st of Rnd 4, ch 2 (counts as first dc), then work [Fpdc, Bpdc] in each st around, working around the posts of Rnd 4 stitches (48 sts). Join with sl st to top of beginning ch-2.
Rnd 6: Ch 2, [Fpdc, Bpdc] around, matching each post stitch to the one below (48 sts). Join with sl st.
Rnd 7: Ch 2, [Fpdc, Bpdc] around (48 sts). Join with sl st.
Rnd 8: Ch 2, [Fpdc, Bpdc] around (48 sts). Join with sl st. Fasten off mauve, leaving a 6-inch tail.
Edging
Rnd 9: Join mauve to any st of Rnd 8, [ch 2, sl st in next st] around, ending with ch 2 and sl st into the joining st (24 ch-2 loops). Fasten off and weave in the tail.
Assembly and Finishing
Weave in all loose ends on the wrong side, using the tapestry needle to hide them under the post stitches. Thread the 6-inch mauve tail through the center of the flower and use it to sew the keyring securely to the middle of the plum center, going through the ring two or three times for strength. Knot firmly and trim. Block lightly by misting with water and pressing flat under a cloth, or pin the charm to a foam mat and let it dry so the petals sit evenly and the edging loops lie flat.
Pro Tips and Variations
- Swap the plum center for pale pink or cream for a softer blossom, or use a sparkly yarn for a magical fairy finish.
- Add a second charm in a contrasting color and join them with a short chain for a dangling bag charm.
- Work the edging in a metallic thread for a subtle shimmer along the scalloped loops.


