Cotton Candy Granny Square Crochet Headwrap Free Pattern
Introduction
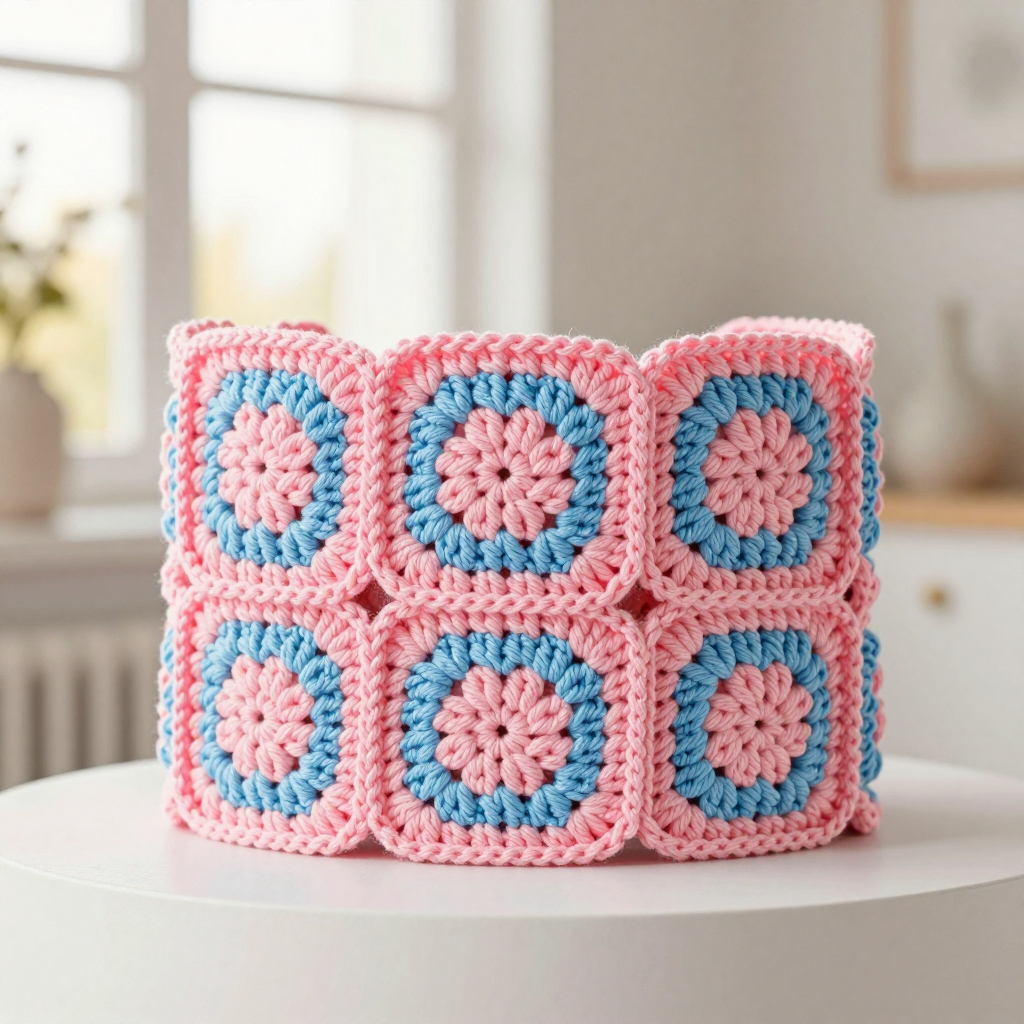
This Cotton Candy Granny Square Crochet Headwrap is a beginner-friendly, retro-maximalist ear warmer that comes together from just five classic granny squares. It is perfect for new crocheters who have mastered the basic stitches and want a quick, satisfying project, and for anyone who loves bold, playful color. The band alternates cotton candy pink and baby blue centers with color-swapped outer rounds, so the two shades dance across the headwrap in a cheerful candy-stripe rhythm. Worked in bulky yarn on a large hook, it is soft, stretchy, and cozy, with a smooth single crochet border framing the whole band for a clean, finished look.
Materials Needed
- Yarn: Bulky (5) weight acrylic or acrylic-wool blend. Color A (cotton candy pink): approx 90 yd (82 m). Color B (baby blue): approx 45 yd (41 m).
- Hook: 10 mm (US N/15).
- Notions: Tapestry needle, scissors, stitch marker (optional), blocking mat and pins.
- Finished size: Band approx 20 in (51 cm) circumference x 4 in (10 cm) wide, unstretched; fits head 21–23 in (53–58 cm).
Abbreviations
- ch – chain
- dc – double crochet
- sc – single crochet
- sl st – slip stitch
- sp – space
- st(s) – stitch(es)
- beg – beginning
- MR – magic ring (adjustable ring)
- rep – repeat
- RS – right side
Gauge
One 4-round granny square = 4 in (10 cm) square after blocking; the sc border rounds work up at about 4 sc per inch. Check your gauge by making one square and measuring it flat after a light block — if it is larger than 4 in, go down a hook size; if smaller, go up.
Tips Before You Start
- Each square is worked in joined rounds and you turn at the end of every round. Turning keeps the granny square flat and prevents it from spiraling.
- Keep your color changes tidy: fasten off each color at the end of its round and join the new color in a corner space, which hides the join neatly.
- Make all five squares first, then lay them out in order (A, B, A, B, A centers) before joining so your color alternation stays correct.
- Work your joining and border stitches a little loosely — bulky yarn plus tight stitches can make the band stiff and less stretchy.
Step-by-Step Instructions
Granny Squares (make 5)
Notes: Squares 1, 3, and 5 have a Color A center; Squares 2 and 4 have a Color B center. All squares use the same 4-round sequence, swapping only the center color. Work in joined rounds, turning at each round end.
Square 1 (A center): With A, make a MR, ch 3 (counts as first dc), 2 dc into ring, [ch 2, 3 dc] x3, ch 2, join with sl st to top of beg ch-3. Fasten off A. (4 groups of 3 dc, 4 corner ch-2 sps)
Rnd 2 (B): Join B in any corner sp, ch 3, [2 dc, ch 2, 3 dc] in same sp, *[3 dc, ch 2, 3 dc] in next corner sp; rep from * around, join. Fasten off B. (8 groups of 3 dc)
Rnd 3 (A): Join A in any corner sp, ch 3, [2 dc, ch 2, 3 dc] in same sp, *3 dc in next ch-1 sp, [3 dc, ch 2, 3 dc] in next corner sp; rep from * around, join. Fasten off A. (12 groups of 3 dc)
Rnd 4 (B): Join B in any corner sp, ch 3, [2 dc, ch 2, 3 dc] in same sp, *3 dc in each ch-1 sp to next corner, [3 dc, ch 2, 3 dc] in corner sp; rep from * around, join. Fasten off B. (16 groups of 3 dc)
Square 1 complete. Make Square 2 with a B center and A outer rounds, Square 3 with an A center, Square 4 with a B center, and Square 5 with an A center, following the same 4-round sequence and swapping the center color only.
Join the Squares
Join: With RS facing, whipstitch or sc-join Squares 1–5 in a row along one edge, matching corner sps, using A. (Band 20 in long x 4 in wide)
Seam the Band
Seam: Fold the band in half with RS together, align the short ends, and whipstitch the short ends together with A. Turn RS out. (Tube 20 in circumference x 4 in wide)
Border
Border Rnd 1: Join A at the seam, ch 1, sc evenly around both long edges of the band, working 1 sc in each dc and 2 sc in each corner sp; join with sl st.
Border Rnd 2: Ch 1, sc in each sc around, join. Fasten off A and weave in ends.
Assembly and Finishing
If you joined the squares with a whipstitch, work the seam with matching A yarn and keep the stitches even so the band lies flat. Weave in all ends on the wrong side, threading each tail through a few stitches before trimming. Lightly block the finished headwrap to 4 in (10 cm) square width — mist with water, pin to measurements, and let it dry fully. Blocking opens up the granny clusters, smooths the sc border, and helps the band hold its shape and stretch.
Pro Tips and Variations
- Change the palette: Swap in mint and lavender, or red and white, for a different candy-shop look — just keep one color for the border so the band stays cohesive.
- Make it wider or narrower: Add a fifth round to each square for a wider ear warmer, or stop at three rounds for a slimmer band; adjust the border stitch count to match.
- Add texture: Work the border in back loop only sc for a subtle ridged edge, or add a final round of crab stitch for a polished, professional finish.