Chocolate Bar Stitch Dishcloth Free Crochet Pattern
Introduction
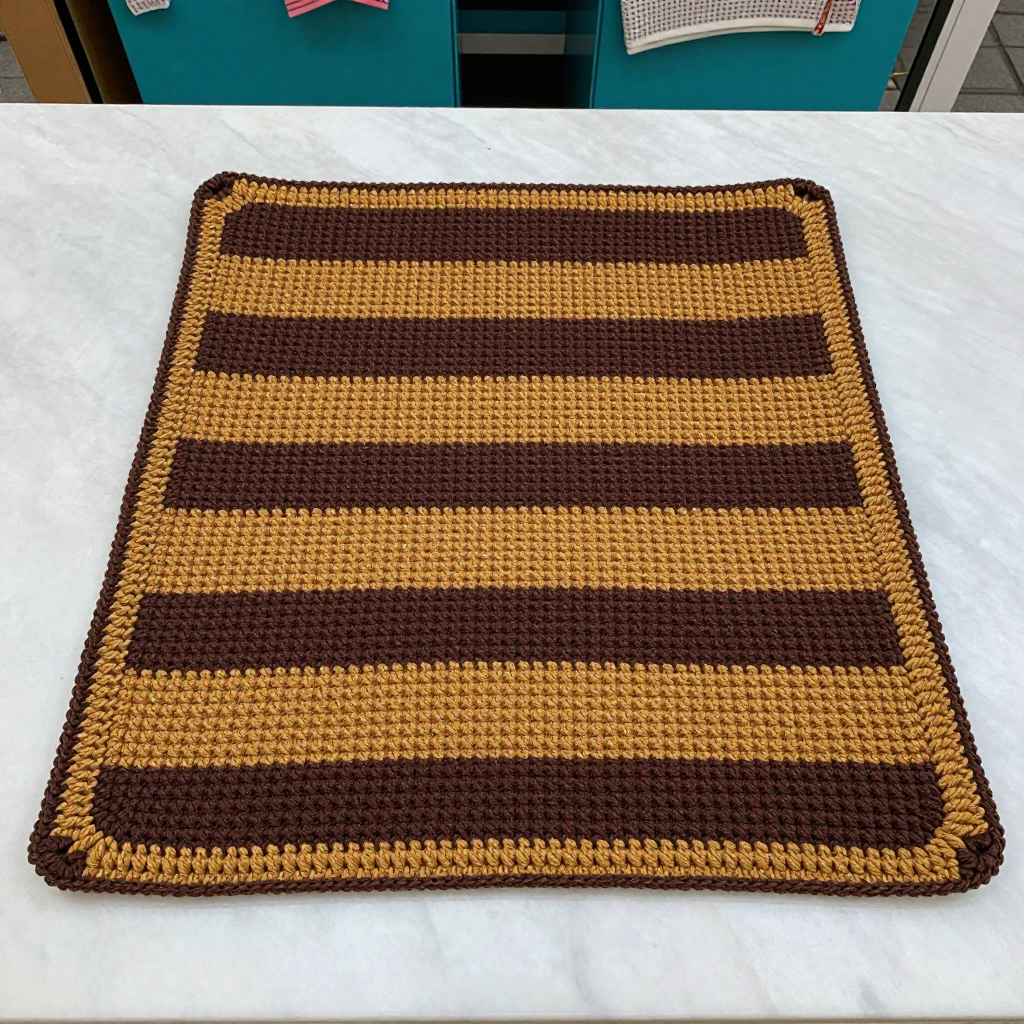
If you love a project that looks fancy but works up fast, this Chocolate Bar Stitch Dishcloth is for you. It's a beginner-friendly pattern made entirely with single and double crochet, so you only need two basic stitches to create a bumpy, grid-like texture that looks just like a chocolate bar. Wide stripes of chocolate brown and caramel give it a warm, sweet-shop feel, and the worsted weight cotton makes it soft, absorbent, and sturdy enough for everyday kitchen use. Worked flat as a simple rectangle, it's a relaxing make that's perfect for gifts, craft fairs, or your own sink.
Materials Needed
- Yarn: Worsted weight (4) cotton yarn, approximately 120 yards total: 60 yards chocolate brown (A) and 60 yards caramel (B). The sample used Lily Sugar'n Cream (100% cotton, 2.5 oz/120 yd per ball).
- Hook: 5.5 mm (I-9) crochet hook
- Notions: Tapestry needle for weaving in ends, scissors, and a measuring tape
- Finished size: Approximately 9 inches wide by 9 inches tall
Abbreviations
- ch – chain: make a loop of yarn and pull it through the loop on your hook.
- sc – single crochet: insert hook into stitch, yarn over, pull up a loop, yarn over, pull through both loops.
- dc – double crochet: yarn over, insert hook into stitch, yarn over, pull up a loop, yarn over and pull through two loops, yarn over and pull through the last two loops.
- st(s) – stitch(es)
- rep – repeat
- sl st – slip stitch: insert hook into stitch, yarn over, pull through both the stitch and the loop on your hook.
Gauge
14 stitches and 12 rows = 4 inches in lemon peel stitch pattern. To check, crochet a small swatch in the pattern and measure a 4-inch section; if you have more stitches than 14, go up a hook size, and if you have fewer, go down a hook size.
Tips Before You Start
- Lemon peel stitch rule: Always work a single crochet into a double crochet and a double crochet into a single crochet. This keeps the texture consistent from row to row.
- Turning chain: The ch 1 at the beginning of each row does not count as a stitch, so your first sc goes into the very first stitch.
- Color changes: Change color at the end of the last row of each stripe, finishing the final stitch with the new color so the stripe edge stays clean.
- Keep it even: Count your stitches at the end of each row (31 sts) to catch accidental increases or missed stitches early.
Step-by-Step Instructions
Dishcloth Body
With A, ch 32.
Row 1: Sc in 2nd ch from hook, dc in next ch, *sc in next ch, dc in next ch; rep from * across, ending with sc in last ch. Turn. (31 sts)
Row 2: Ch 1, sc in first st, dc in next st, *sc in next st, dc in next st; rep from * across, ending with sc in last st. Turn. (31 sts)
Rows 3-12: Rep Row 2. (31 sts) [12 rows total in A]
Change to B.
Rows 13-24: Rep Row 2. (31 sts) [12 rows in B]
Change to A.
Rows 25-36: Rep Row 2. (31 sts) [12 rows in A]
Change to B.
Rows 37-48: Rep Row 2. (31 sts) [12 rows in B]
Do not fasten off.
Edging
Edging: Ch 1, sc evenly around entire piece, working 1 sc in each st and 1 sc in each row-end, and 3 sc in each corner. Join with sl st to first sc. Fasten off.
Assembly and Finishing
This dishcloth is worked in one piece, so there is no seaming required. Weave in all ends with your tapestry needle, working them into the back of the fabric in opposite directions so they stay secure. Block lightly to the finished measurements of approximately 9 inches by 9 inches: mist the cloth with water, pin it to a towel or blocking mat, and let it dry completely. This opens up the lemon peel texture and gives the cloth crisp, even edges.
Pro Tips and Variations
- Make a set: Work the stripes in different color pairs, such as cream and milk chocolate or mint and dark brown, to create a matching kitchen set.
- Add a hanging loop: Before fastening off the edging, ch 10 and sl st back to the corner to create a small loop for hanging.
- Change the size: For a larger cloth, chain any odd number of stitches; for a smaller one, chain fewer, keeping the same alternating sc and dc pattern.