Whimsical Slip Stitch Flower Headband Free Crochet Pattern
Introduction
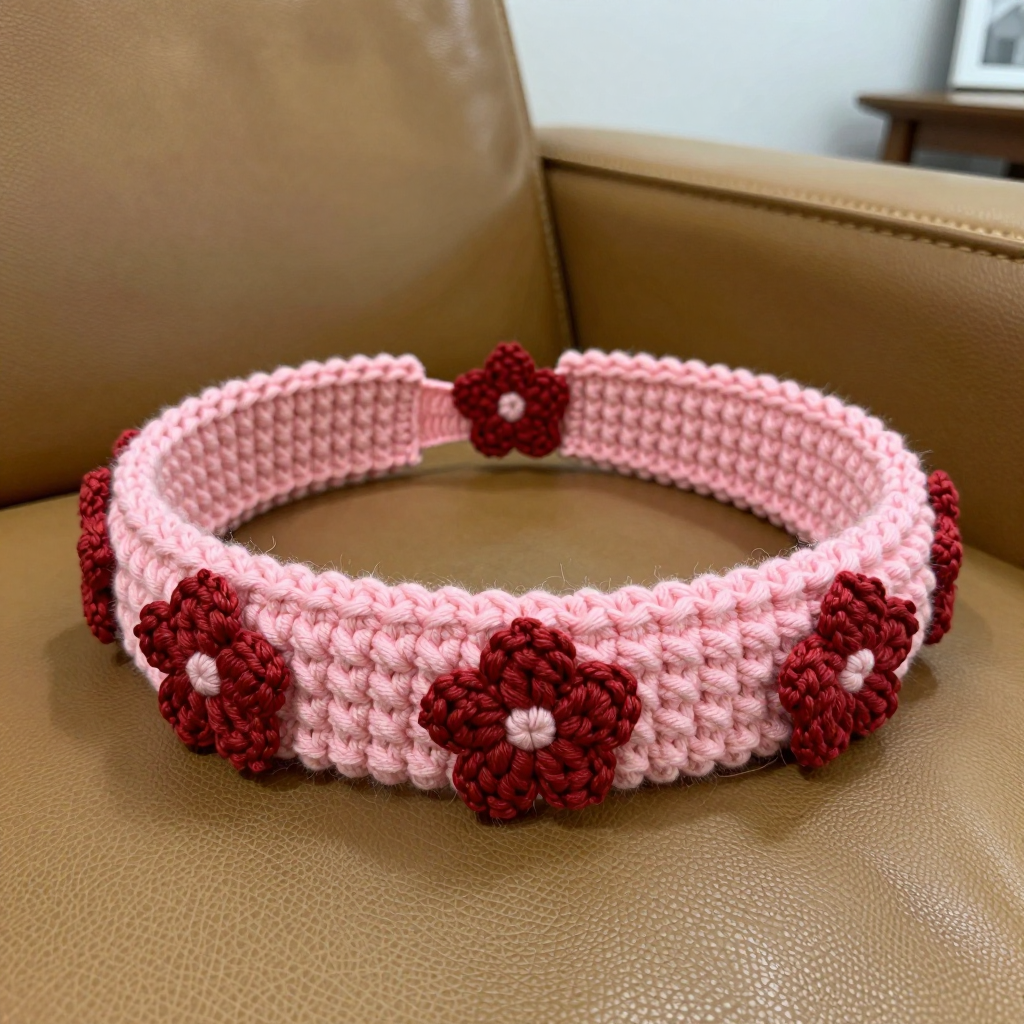
This Whimsical Slip Stitch Flower Headband is a sweet, quick little project that anyone who loves crochet can make. It's perfect for beginners ready to try a new stitch texture, for gift-makers, and for anyone who wants a cheerful accessory for themselves or a little one. The headband is a simple pink tube worked in dense slip stitch, which gives it a slightly ridged, woven look that feels soft and stretchy against the head. Three cherry red slip stitch flowers sit along the front, with the center flower just a touch higher for that playful, whimsical touch.
Materials Needed
- Yarn: Worsted weight (category 4) acrylic yarn — approximately 50 yards (46 m) pink and 20 yards (18 m) cherry red
- Hook: 5.0 mm (H-8) crochet hook
- Notions: Tapestry needle for sewing and weaving in ends, scissors, stitch marker (optional), pins for placing flowers
- Finished size: Headband circumference 20 inches (51 cm), width 2 inches (5 cm); each flower 2 inches (5 cm) in diameter
Abbreviations
- ch — chain: yarn over and pull through the loop on your hook
- sl st — slip stitch: insert hook, yarn over, pull through both the stitch and the loop on your hook
- sc — single crochet: insert hook, yarn over, pull up a loop, yarn over, pull through both loops
- MR — magic ring: an adjustable loop used to start working in the round
- st / sts — stitch / stitches
- R — round
Gauge
16 stitches and 16 rounds = 4 inches (10 cm) in slip stitch worked in the round. To check it, work a small swatch in the round in slip stitch and measure a 4-inch section; adjust your hook size if needed so the headband comes out at the right circumference.
Tips Before You Start
- Slip stitch fabric is dense and pulls in, so keep your tension relaxed — if your stitches feel tight, go up one hook size.
- When joining the starting chain into a ring, check carefully that the chain isn't twisted before you join.
- Use a stitch marker at the start of each round so you always know where to join.
- Leave a generous tail on each flower (about 8 inches) — you'll use it to sew the flowers onto the headband.
Step-by-Step Instructions
Headband (Pink)
Setup: Ch 41, join with sl st to first ch to form a ring, being careful not to twist.
R1: Ch 1, sc in each ch around, join with sl st to first sc (40 sc).
R2: Ch 1, sl st in each st around, join with sl st to first sl st (40 sl st).
R3–R16: Repeat R2 (40 sl st each round).
Fasten off. Weave in ends.
Flowers (Cherry Red) — make 3
Setup: MR, 5 sc into the ring, join with sl st to first sc (5 sc).
R1: Ch 1, [sl st in next sc, ch 2, sl st in same sc] 5 times, join with sl st to first sl st (5 petals).
Fasten off, leaving a long tail for sewing. Repeat to make 3 flowers total.
Assembly and Finishing
Pin the three flowers evenly spaced along the front of the headband, about 1 inch apart, with the center flower positioned slightly higher than the two side flowers. Using the yarn tails and a tapestry needle, sew each flower firmly in place, catching the base of the petals so they sit flat. Weave in all remaining ends on the wrong side. Lightly steam or wet block the headband to even out the slip stitch texture, then lay flat to dry.
Pro Tips and Variations
- Try a contrasting color for the flowers — white, mustard, or lavender all look lovely against pink.
- Add a tiny pearl or bead to the center of each flower for extra sparkle.
- Make a matching set by working the headband in a thinner yarn with a 4.0 mm hook for a child's size.


