Sage Green Mesh Beach Tote: Free Crochet Pattern
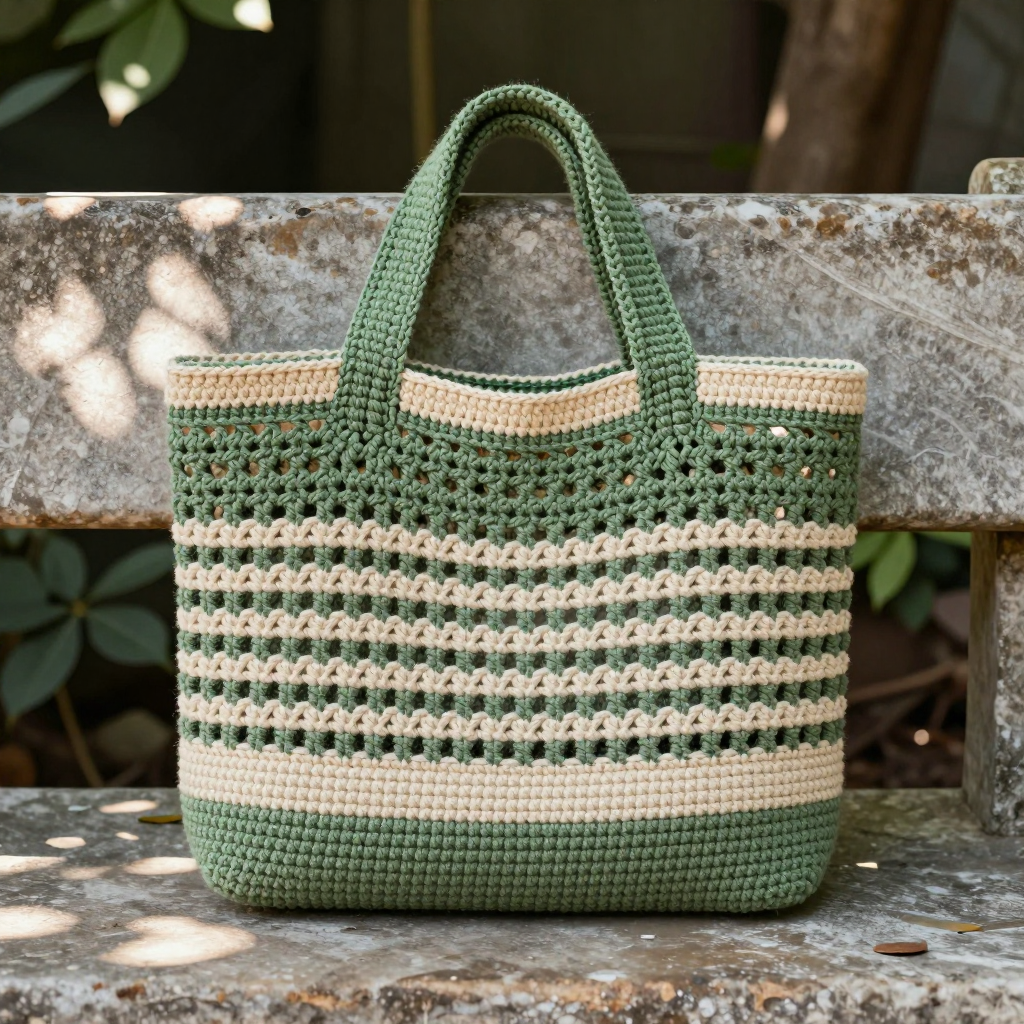
Sage Green Mesh Beach Tote: Free Crochet Pattern
Introduction
This sage green mesh beach tote is the perfect summer project for anyone who has just learned double crochet and wants to make something they will actually use. It is built from two simple flat rectangles joined at the sides and bottom, so there is no shaping, no working in the round, and no complicated stitchwork to worry about. The open ch-1 mesh gives it a breezy, airy look that lets sand shake right through, and the cream stripes add a fun Y2K-inspired touch. Worked in worsted weight cotton, the finished bag feels sturdy but light, holds its shape beautifully, and is roomy enough for a towel, sunscreen, and a good book.
Materials Needed
- Yarn: Worsted weight (category 4) cotton yarn. Sage green (MC): 200 yards. Cream (CC): 100 yards.
- Hook: 4.5 mm (US 7) crochet hook.
- Notions: Tapestry needle, scissors, stitch markers (optional), measuring tape.
- Finished size: Approximately 14 inches wide x 16 inches tall (excluding handles), with 20-inch handles.
Abbreviations
- ch – chain: yarn over and pull through the loop on your hook.
- dc – double crochet: yarn over, insert hook in stitch, pull up a loop, yarn over and pull through 2 loops, yarn over and pull through remaining 2 loops.
- sc – single crochet: insert hook in stitch, pull up a loop, yarn over and pull through both loops.
- sk – skip: miss the next stitch without working into it.
- sp – space: the gap created by a chain (here, a ch-1 space).
- st(s) – stitch(es).
- rep – repeat.
- MC – main color (sage green).
- CC – contrasting color (cream).
- RS – right side (the outside of the bag).
Gauge
16 stitches and 8 rows in the mesh pattern = 4 inches (10 cm). To check, crochet a small swatch in the mesh pattern, lay it flat, and measure a 4-inch section; if you have more stitches than 16, go up a hook size, and if you have fewer, go down.
Tips Before You Start
- Count your ch-1 spaces at the end of each mesh row — each row should have 28 ch-1 spaces. Consistent spacing is what keeps the bag square.
- Change colors on the last yarn-over of the final stitch of the row before the new color begins, so the color change sits cleanly at the edge.
- Make both panels one after the other so your tension stays consistent between them; they need to match for the bag to sit flat.
- Keep your single crochet joining stitches even and not too tight, or the side seams will pucker.
Step-by-Step Instructions
Panel (make 2)
With MC, ch 58.
Row 1: Dc in 4th ch from hook (skipped 3 ch count as first dc), dc in each ch across, turn (56 dc).
Row 2: Ch 3 (counts as first dc), sk next st, dc in next st, *ch 1, sk next st, dc in next st; rep from * across, turn (28 dc, 27 ch-1 sps).
Row 3: Ch 3, dc in first ch-1 sp, *ch 1, dc in next ch-1 sp; rep from * across, dc in last st (top of turning ch), turn (29 dc, 28 ch-1 sps).
Rows 4-5: Rep Row 3 (29 dc, 28 ch-1 sps).
Change to CC.
Rows 6-7: Rep Row 3 (29 dc, 28 ch-1 sps).
Change to MC.
Rows 8-29: Rep Row 3 (29 dc, 28 ch-1 sps).
Change to CC.
Rows 30-31: Rep Row 3 (29 dc, 28 ch-1 sps).
Change to MC.
Rows 32-33: Rep Row 3 (29 dc, 28 ch-1 sps).
Fasten off.
Handles (make 2)
With MC, ch 4.
Row 1: Sc in 2nd ch from hook and in each ch across, turn (3 sc).
Rows 2-60: Ch 1, sc in each st across, turn (3 sc).
Fasten off, leaving a long tail for sewing.
Assembly
Place panels with RS together. Join MC yarn at bottom right corner. Sc evenly along bottom edge through both layers to join, then sc along each side edge through both layers. Fasten off. Turn bag RS out.
Attaching the Handles
Position handle ends 3 inches from side edges on top of each panel. Sew securely with MC.
Edging
Join CC at top right corner. Sc evenly around top edge, working through both layers at handle attachments for reinforcement. Fasten off. Weave in ends.
Assembly and Finishing
With the panels still right sides together, work your single crochet joining along the bottom edge first, then up each side, keeping your stitches evenly spaced (about one sc per stitch or per row along the edges). Turn the bag right side out and gently push out the corners. Sew the handles on with the long tails, going over each attachment point several times for strength. Weave in all ends on the inside of the bag. Block lightly by misting with water and laying flat to dry, shaping the bag into a neat rectangle as it dries.
Pro Tips and Variations
- Swap the cream stripes for a bright color like coral or lemon for a bolder summer look, or work the whole bag in one color for a minimalist finish.
- Add a simple cotton lining sewn in by hand to keep small items from slipping through the mesh.
- Make the handles longer for a shoulder bag, or add a ch-1 mesh strap in CC for a two-tone detail.


