Preppy Chevron Water Bottle Holder Free Crochet Pattern
Introduction
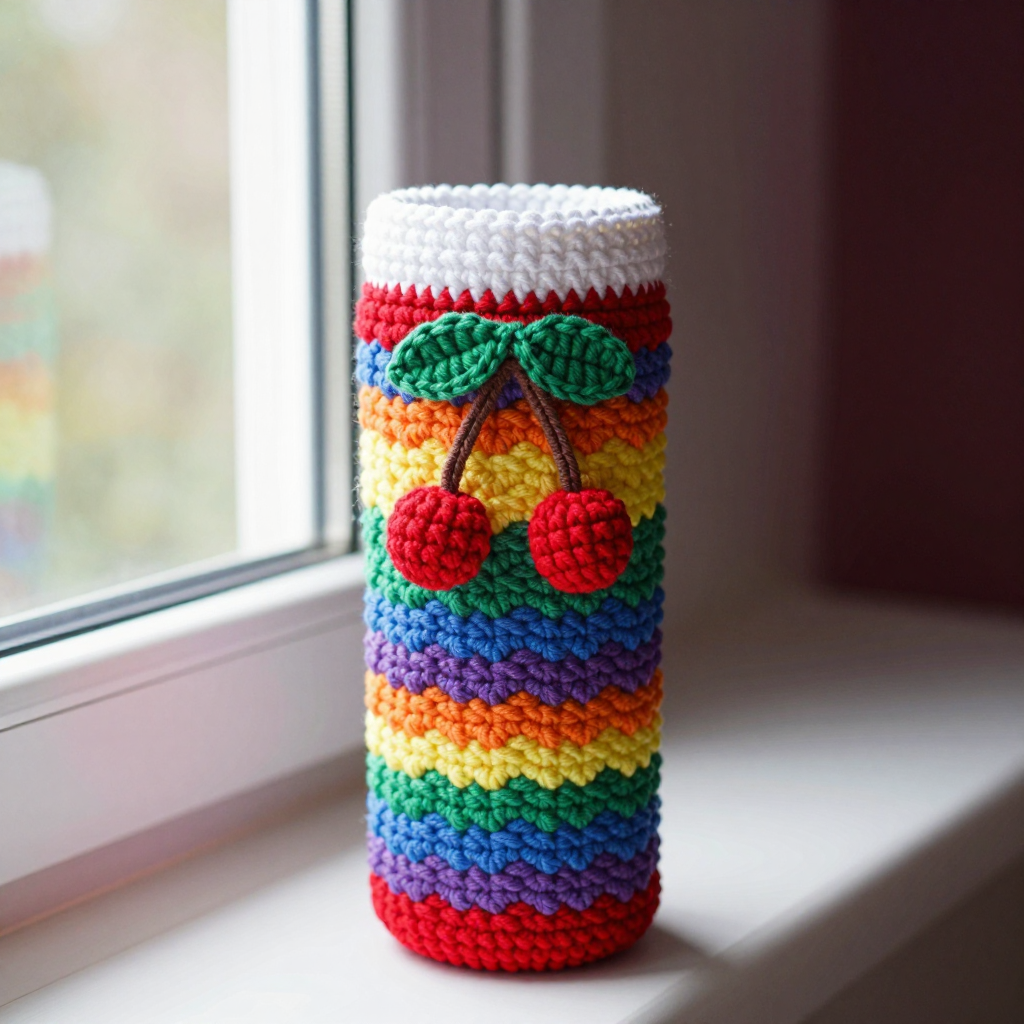
This preppy chevron water bottle holder is the perfect little project for anyone who has mastered single crochet and is ready to try something with a bit more rhythm. Worked in soft, plush chenille yarn, it wraps your water bottle in a squishy rainbow of two-row stripes and a gentle ripple texture that looks far more complicated than it is. The finished holder is a straight cylinder about 3.5 inches across and 7 inches tall, with a crisp white edge at the top and a pair of cherry appliqués on the front for that classic preppy finish. It feels cozy in the hand, stretches to hug most standard bottles, and works up quickly enough to make one for yourself and a few for friends.
Materials Needed
- Yarn: Bulky (weight 5), 100% polyester chenille. Color A (Red) 20 yd, B (Orange) 20 yd, C (Yellow) 20 yd, D (Green) 20 yd, E (Blue) 20 yd, F (Purple) 20 yd, G (Pink) 10 yd, H (White) 5 yd, I (Brown) 2 yd.
- Hook: 5.0 mm (H-8) crochet hook.
- Notions: Stitch marker, tapestry needle, scissors.
- Finished size: Approx. 3.5 inches (9 cm) diameter, 7 inches (18 cm) tall; stretches to fit bottles up to 3.75 inches (9.5 cm) diameter.
Abbreviations
- ch – chain
- sc – single crochet
- hdc – half double crochet
- dc – double crochet
- sl st – slip stitch
- sk – skip
- st(s) – stitch(es)
- inc – increase (work 2 sc in the same stitch)
- MR – magic ring
- R / Rnd – row / round
Gauge
12 sts and 8 rows = 4 inches (10 cm) in chevron pattern. To check, work a small swatch in pattern and measure a 4-inch section; adjust your hook size if your stitches are much tighter or looser than this.
Tips Before You Start
- Chenille yarn sheds and is hard to unravel, so count your stitches as you go rather than ripping back later.
- Keep your tension relaxed and even; tight chevron stitches make the holder stiff and less stretchy.
- Place a stitch marker in the first stitch of each round so you always know where to join.
- When changing colors, pull the new color through on the final yarn-over of the join so the stripe edge stays clean.
Step-by-Step Instructions
Holder (worked in rounds)
With A, ch 42, join with sl st to first ch to form a ring, being careful not to twist.
R1: Ch 1, sc in same ch as join, sc in next 5 ch, 3 sc in next ch, sc in next 5 ch, sk next 2 ch, sc in next 5 ch, 3 sc in next ch, sc in next 5 ch, sk next 2 ch, sc in next 5 ch, 3 sc in next ch, sc in next 5 ch, sk next 2 ch, join with sl st to first sc (42 sts).
R2: Ch 1, sc in same st as join, sc in next 5 sts, 3 sc in next st, sc in next 5 sts, sk next 2 sts, sc in next 5 sts, 3 sc in next st, sc in next 5 sts, sk next 2 sts, sc in next 5 sts, 3 sc in next st, sc in next 5 sts, sk next 2 sts, join with sl st to first sc (42 sts).
Change to B.
R3-4: Repeat R2 (42 sts).
Change to C.
R5-6: Repeat R2 (42 sts).
Change to D.
R7-8: Repeat R2 (42 sts).
Change to E.
R9-10: Repeat R2 (42 sts).
Change to F.
R11-12: Repeat R2 (42 sts).
Change to A.
R13-14: Repeat R2 (42 sts).
Change to B.
R15-16: Repeat R2 (42 sts).
Change to C.
R17-18: Repeat R2 (42 sts).
Change to D.
R19-20: Repeat R2 (42 sts).
Change to E.
R21-22: Repeat R2 (42 sts).
Change to F.
R23-24: Repeat R2 (42 sts).
Change to A.
R25-26: Repeat R2 (42 sts).
Fasten off. Weave in ends.
Cherry Appliqué (make 2)
With A, MR 6 sc.
R2: inc x6 (12 sts).
R3: [sc, inc] x6 (18 sts).
R4: sc in each st around (18 sts).
Fasten off, leaving a long tail for sewing.
Stem
With I, ch 10.
R1: Sl st in 2nd ch from hook and each ch across (9 sl sts).
Fasten off, leaving a long tail for sewing.
Leaf
With D, ch 6.
R1: Sc in 2nd ch from hook, hdc in next ch, dc in next ch, hdc in next ch, sc in last ch.
Fasten off, leaving a long tail for sewing.
Edging
With H, join yarn at top edge of holder.
R1: Ch 1, sc in each st around, join with sl st to first sc.
Fasten off. Weave in ends.
Assembly and Finishing
Sew the cherries to the front of the holder using the photo as a guide, placing them side by side with their bottoms touching. Sew the stem above the cherries, curving it slightly. Sew the leaf at the top of the stem. Weave in all ends. Block lightly by misting with water and shaping the holder over a bottle or jar to dry, which helps the chevron pattern settle evenly.
Pro Tips and Variations
- Swap the rainbow stripes for two or three colors in your favorite team or school palette for a custom preppy look.
- Add a small crocheted loop at the top edge to clip the holder to a bag or stroller.
- Use a contrasting yarn for the edging, or work two rounds of edging for a bolder rim.


