Olive Granny Square Belt Bag Free Crochet Pattern
Introduction
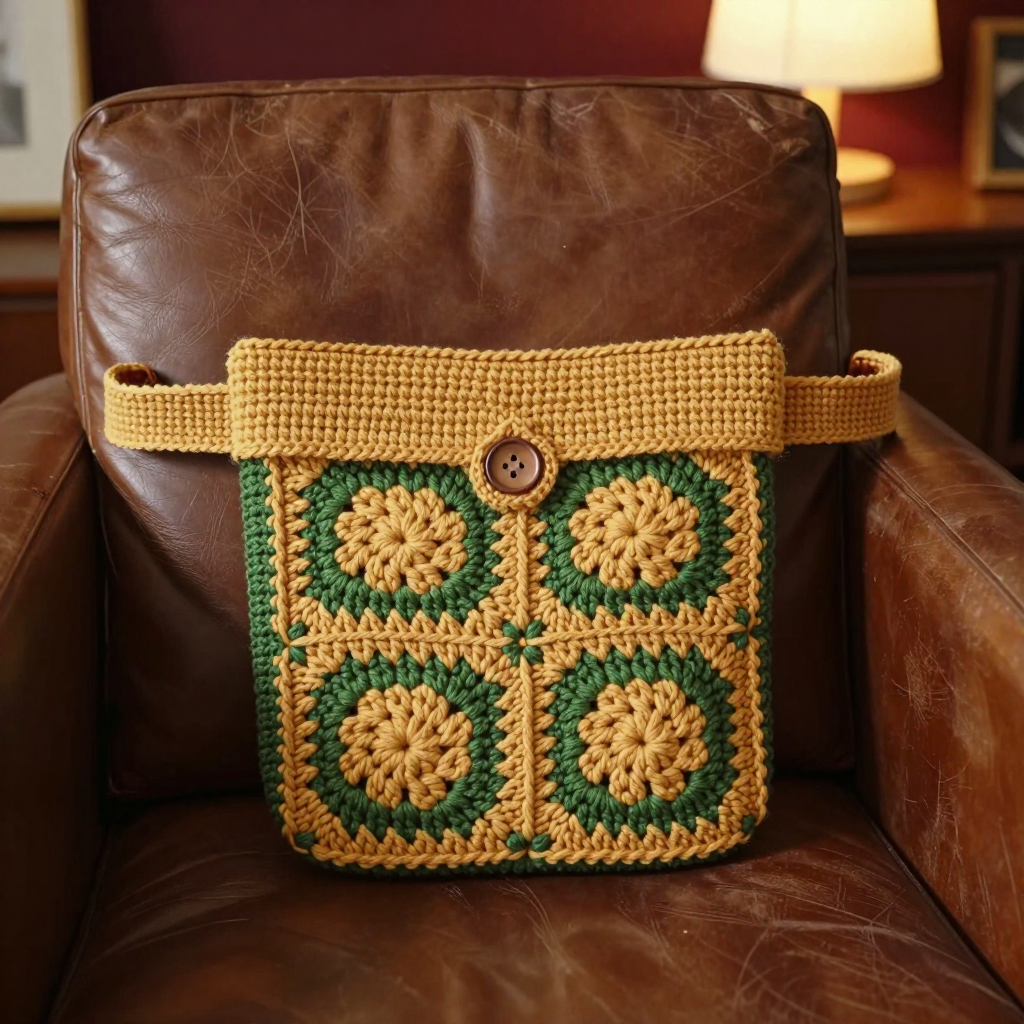
This olive granny square belt bag is a streetwear-inspired accessory that turns a classic motif into something you can actually wear hands-free. It's made from four olive granny squares joined in a 2x2 grid, edged and finished with a wide ochre belt, a simple flap closure, and a button. The finished pouch is 8" wide x 8" tall x 1.5" deep, so it holds a phone, keys, and cards while sitting snugly at your waist. It looks bold and structured on the outside, and the cotton yarn gives it a sturdy, slightly crisp feel that softens with wear. If you can make a granny square and work single crochet, you have every skill this pattern needs.
Materials Needed
- Yarn: Worsted weight (category 4) cotton or cotton blend. Color A (olive): 150 yds. Color B (ochre): 100 yds.
- Hook: 4.0 mm (US G-6)
- Notions: Tapestry needle, stitch markers, scissors, one 0.75" button, sewing needle and thread (for the button), optional 8.5" x 8.5" fabric for lining
- Finished size: Bag body 8" wide x 8" tall x 1.5" deep; belt 1.5" wide and adjustable in length (fits waist 28-36")
Abbreviations
- ch – chain
- sl st – slip stitch
- sc – single crochet
- dc – double crochet
- sp – space
- st(s) – stitch(es)
- sc2tog – single crochet two stitches together (a decrease)
- rep – repeat
Gauge
One granny square measures 4" (10 cm) square after 5 rounds. Work one square first and measure it flat; if it's larger, go down a hook size, and if it's smaller, go up a hook size.
Tips Before You Start
- Make all four squares before joining so you can compare them and swap any that come out noticeably different in size.
- Keep your ch-1 spaces loose enough to work into on the next round, but not so loose that the corners gape.
- Work the belt in a firm, even tension so it doesn't stretch out of shape when worn; cotton holds up well here.
- Try the bag on before sewing the belt loops, so you can position the belt at the height you like best.
Step-by-Step Instructions
Granny Square (make 4, Color A)
Rnd 1: Ch 4, join with sl st to form ring. Ch 3 (counts as dc), 2 dc in ring, [ch 2, 3 dc in ring] 3 times, ch 2, join with sl st to top of ch-3. (12 dc, 4 ch-2 sps)
Rnd 2: Ch 3, 2 dc in same sp, ch 2, 3 dc in same sp (corner), *ch 1, [3 dc, ch 2, 3 dc] in next ch-2 sp; rep from * around, ch 1, join. (24 dc, 4 ch-1 sps, 4 ch-2 sps)
Rnd 3: Ch 3, 2 dc in same sp, ch 2, 3 dc in same sp, *ch 1, 3 dc in next ch-1 sp, ch 1, [3 dc, ch 2, 3 dc] in next ch-2 sp; rep from * around, ch 1, join. (36 dc, 8 ch-1 sps, 4 ch-2 sps)
Rnd 4: Ch 3, 2 dc in same sp, ch 2, 3 dc in same sp, *[ch 1, 3 dc in next ch-1 sp] twice, ch 1, [3 dc, ch 2, 3 dc] in next ch-2 sp; rep from * around, ch 1, join. (48 dc, 12 ch-1 sps, 4 ch-2 sps)
Rnd 5: Ch 3, 2 dc in same sp, ch 2, 3 dc in same sp, *[ch 1, 3 dc in next ch-1 sp] 3 times, ch 1, [3 dc, ch 2, 3 dc] in next ch-2 sp; rep from * around, ch 1, join. (60 dc, 16 ch-1 sps, 4 ch-2 sps) Fasten off.
Bag Body
Join squares: With A, whipstitch the 4 squares in a 2x2 grid, matching stitches.
Fold: Fold the grid in half to form the bag shape (front and back are each 2 squares).
Side seams: With A, sc the sides together through both layers, from the bottom corners up to the top edge, leaving the top open.
Bottom: With A, sc across the bottom opening, joining the front and back squares.
Edging: With B, sc around the top opening, working 1 sc in each st and 1 sc in each ch-1 sp. Fasten off.
Lining (optional)
Cut fabric 8.5" x 8.5". Fold in half, sew the side seams, insert into the bag, and whipstitch the top edge to the inside of the bag.
Flap (Color B)
Join yarn at the top center of the back panel.
Row 1: Ch 1, sc in same st, sc in each st across to the end of the back panel (approx 30 sc). Turn.
Row 2: Ch 1, sc in each sc across. Turn. (30 sc)
Row 3: Ch 1, sc2tog, sc in each sc across to last 2 sts, sc2tog. Turn. (28 sc)
Rows 4-8: Rep Row 3 until 20 sc remain. Fasten off.
Buttonhole: With B, join yarn at the center of the flap edge, ch 3, skip 2 sc, sl st in next sc. Fasten off.
Button: Sew the 0.75" button to the front of the bag, aligned with the buttonhole.
Belt (Color B)
Ch 6.
Row 1: Sc in 2nd ch from hook and in each ch across. (5 sc) Turn.
Row 2: Ch 1, sc in each sc across. Turn. (5 sc)
Rows 3-40" length: Rep Row 2 until the belt measures 40" (or your desired length). Fasten off.
Belt Loops (make 2, Color B)
Ch 8, join with sl st to form a ring. Sc in each ch around. Fasten off.
Assembly and Finishing
Sew the belt loops to the back of the bag at each side, 1" from the top, leaving each loop open so the belt can slide through. Slide the belt through both loops and adjust the length to fit your waist. Weave in all ends on the wrong side, working them through the stitches rather than knotting them. Block the bag lightly: mist it, shape it flat with the flap closed, and let it dry fully so the squares sit square and the belt keeps its width.
Pro Tips and Variations
- Swap the ochre for a contrasting color like rust or cream to change the whole look without altering the pattern.
- Add a fabric lining in a fun print for extra structure and to keep small items from slipping through the granny square holes.
- Make the belt longer and add a second buttonhole so it can be worn crossbody as well as at the waist.


