Mid-Century Mesh Beret: Free Crochet Pattern
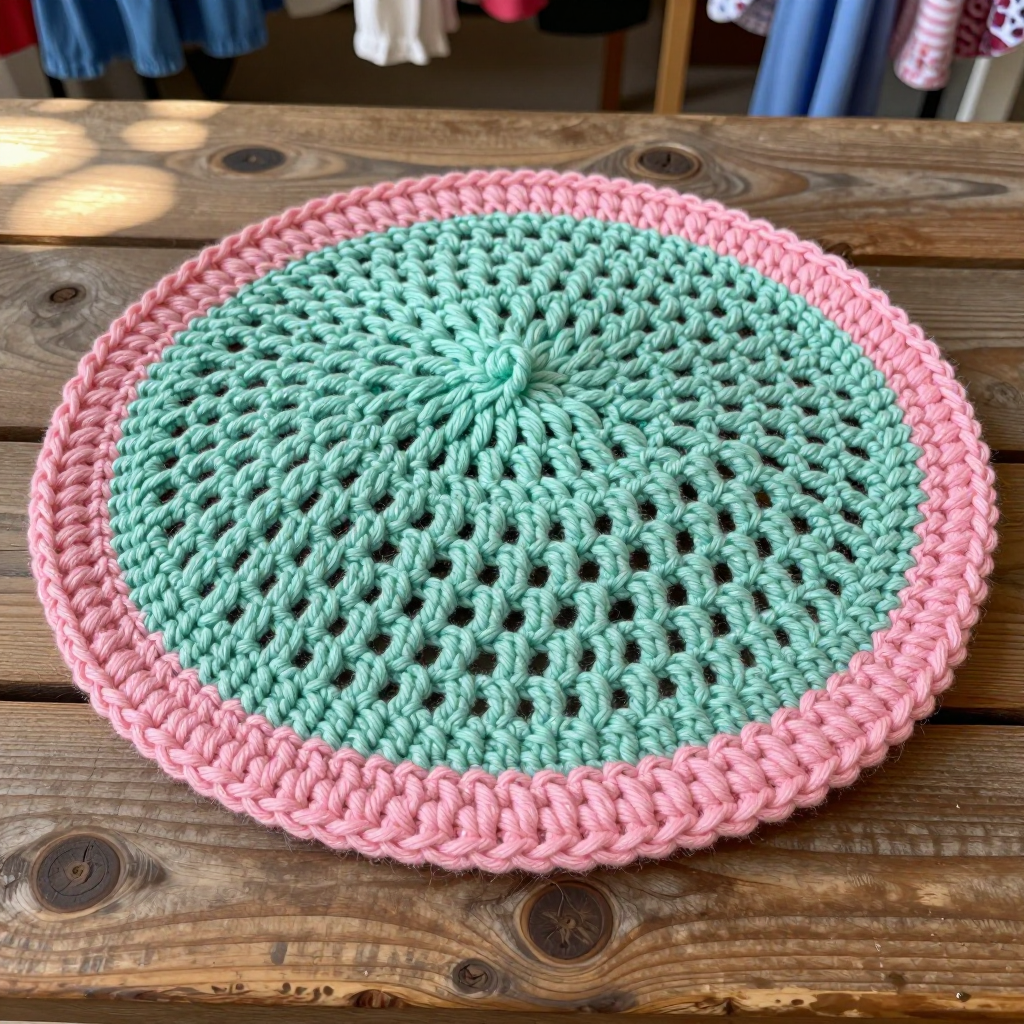
Mid-Century Mesh Beret: Free Crochet Pattern
Introduction
This mid-century mesh beret is a love letter to the clean lines and soft pastels of 1960s design. It is written for anyone who has mastered single and double crochet and wants a small, satisfying project that looks far more intricate than it is. The solid pink band hugs the head while the mint crown opens into an airy net of chain-3 spaces, then flares into a wide, flat disc for that classic beret silhouette. Slip it on and it feels light as air, with just enough structure at the band to stay put all day.
Materials Needed
- Yarn: Worsted weight (4) acrylic yarn, approximately 150 yards total: 100 yards mint (Color A), 50 yards pink (Color B).
- Hook: 5.0 mm (H-8) crochet hook.
- Notions: Tapestry needle for seaming and weaving in ends, scissors, and a stitch marker (optional, for marking the first stitch of each round).
- Finished size: One size fits an average adult head (21–23" circumference); beret diameter approximately 11".
Abbreviations
- ch — chain: yarn over and pull through the loop on your hook.
- sc — single crochet: insert hook, yarn over, pull up a loop, yarn over, pull through both loops.
- dc — double crochet: yarn over, insert hook, pull up a loop, yarn over and pull through two loops, yarn over and pull through the last two loops.
- sl st — slip stitch: insert hook, yarn over, pull through both the stitch and the loop on your hook.
- sk — skip: work past the stated number of stitches without working into them.
- sp — space: the opening formed by a chain, worked into rather than into a stitch.
- st(s) — stitch(es).
- rep — repeat.
- inc — increase: work two single crochet into the same stitch or space.
Gauge
6 stitches = 2" in half double crochet, and 1 mesh repeat (ch 3, sc) = 1". Work a small swatch and measure it before beginning; if your mesh spaces are larger than 1", go down a hook size, and if smaller, go up.
Tips Before You Start
- Measure the band before seaming. It should be about 20" unstretched so it grips the head gently; a band that is too long will slide down.
- When working Round 1 of the crown, space your 80 single crochet evenly along the band edge so the crown sits flat and does not pucker.
- Keep your chain-3 spaces loose and even. Tension here is what gives the mesh its crisp, open look.
- Use a stitch marker in the first stitch of each round so your joins stay in a straight line.
Step-by-Step Instructions
Band (Color B)
Row 1: Ch 6, sc in 2nd ch from hook and each ch across (5 sts).
Row 2: Ch 1, turn, sc in each st across (5 sts).
Rows 3–40: Rep Row 2 until band measures 20" unstretched (5 sts).
Fasten off, leaving a long tail for seaming. Join the short ends with a whipstitch to form a ring.
Crown (Color A)
Join Color A to the top edge of the band.
Rnd 1: Ch 1, sc evenly around top edge of band (80 sc). Join with sl st to first sc.
Rnd 2: Ch 3 (counts as dc), dc in each st around (80 dc). Join.
Rnd 3: Ch 1, sc in same st, *ch 3, sk next 2 sts, sc in next st; rep from * around, ending with ch 3, sk last 2 sts, join with sl st to first sc (26 ch-3 sps).
Rnd 4: Sl st into first ch-3 sp, ch 1, sc in same sp, *ch 3, sc in next ch-3 sp; rep from * around, join (26 sps).
Rnds 5–10: Rep Rnd 4 (26 sps).
Rnd 11: Ch 1, sc in each ch-3 sp around, increasing 8 sc evenly (34 sc). Join.
Rnd 12: Ch 1, sc in each st around (34 sc). Join. Fasten off.
Edging (Color B)
Join Color B to any st of Rnd 12.
Rnd 1: Ch 1, sc in each st around (34 sc). Join with sl st to first sc. Fasten off.
Assembly and Finishing
Whipstitch the short ends of the band together to close the ring, then weave in all ends on the wrong side with your tapestry needle. Block the beret by misting it lightly with water and pinning the crown flat to an 11" circle on a towel or blocking mat; let it dry completely. This sets the mesh open and gives the disc its smooth, even shape.
Pro Tips and Variations
- Swap the pink band and edging for a deeper jewel tone like teal or plum for a bolder mid-century contrast.
- Work Rnds 5–10 in alternating colors for a striped mesh crown.
- Add a second edging round in Color A for a crisp two-tone rim that frames the face.


