Lunar Landing Beret: Free Crochet Pattern for Dogs
Introduction
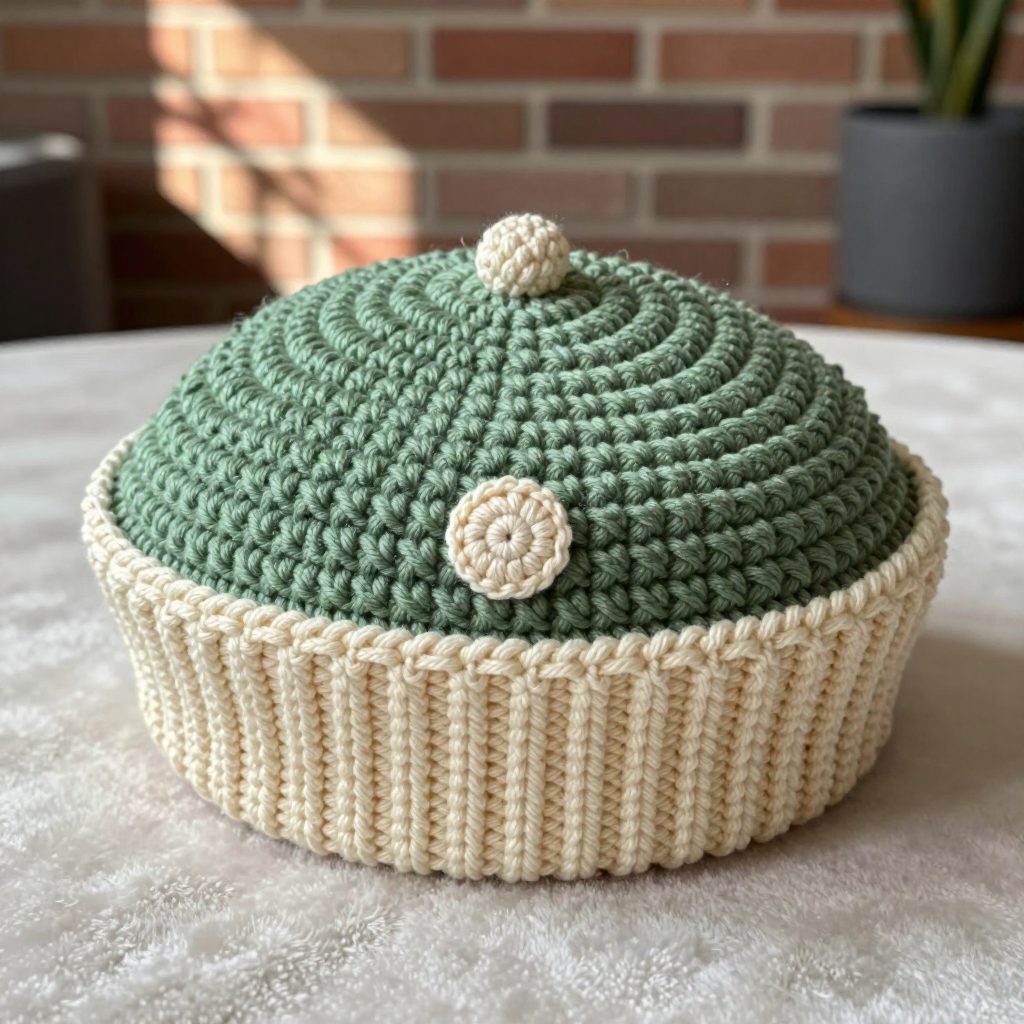
The Lunar Landing Beret is a playful little hat for medium-sized dogs who deserve a touch of space-age style on their daily walks. It is worked as a flat, ribbed circle in soft sage green, finished with a cream ribbed band and a tiny stuffed dome button at the crown that nods to a lunar module. The front and back post ribbing gives the band a wonderfully stretchy, textured fit that hugs the head without slipping, while the wool-blend yarn feels warm and gentle against the ears. Whether your pup is a seasoned cosmonaut or just humoring you for a photo, this beret is quick to make, satisfying to wear, and charming from every angle.
Materials Needed
- Yarn: Aran weight wool blend (approximately 60% wool, 40% acrylic). Total approximately 80 yards (73 m): 60 yards (55 m) in sage green (Color A) and 20 yards (18 m) in cream (Color B).
- Hook: 5.0 mm (US H-8) crochet hook.
- Notions: Stitch marker, tapestry needle, scissors, and a small amount of polyester fiberfill for the button.
- Finished size: Circumference 14 inches (35.5 cm) unstretched, stretching to fit up to 16 inches (40.5 cm); height 5 inches (12.5 cm) including the band.
Abbreviations
- ch – chain
- sl st – slip stitch
- sc – single crochet
- dc – double crochet
- fpdc – front post double crochet (worked around the post of the stitch in front of your work)
- bpdc – back post double crochet (worked around the post of the stitch behind your work)
- inc – increase (work 2 stitches into the same stitch)
- dec – decrease (work 2 stitches together)
- MR – magic ring
- rep – repeat
- sts – stitches
Gauge
16 stitches and 16 rows = 4 inches (10 cm) in the front/back post ribbing pattern. To check, work a small swatch of alternating fpdc and bpdc and measure it flat; adjust your hook size if your gauge differs.
Tips Before You Start
- Keep your turning chains consistent: the ch 3 at the start of each round counts as the first dc, so join to the top of that chain to keep your stitch count accurate.
- When working fpdc and bpdc, insert your hook around the post of the stitch rather than into the top loops — this is what creates the stretchy ribbed texture.
- Stuff the lunar module button only lightly so it keeps a rounded dome shape rather than bulging.
- Try the beret on your dog before sewing the button down, so you can adjust the band placement for the most comfortable fit.
Step-by-Step Instructions
Beret Circle (Color A)
Setup: Ch 4, join with sl st to form a ring.
R1: Ch 3 (counts as dc), 11 dc in ring, join with sl st to top of ch-3 (12 dc).
R2: Ch 3, dc in same st, 2 dc in each st around, join (24 dc).
R3: Ch 3, dc in same st, *dc in next st, 2 dc in next st; rep from * around, join (36 dc).
R4: Ch 3, dc in same st, *dc in next 2 sts, 2 dc in next st; rep from * around, join (48 dc).
R5: Ch 3, dc in same st, *dc in next 3 sts, 2 dc in next st; rep from * around, join (60 dc).
R6: Ch 3, dc in same st, *dc in next 4 sts, 2 dc in next st; rep from * around, join (72 dc).
R7: Ch 3, dc in same st, *dc in next 5 sts, 2 dc in next st; rep from * around, join (84 dc).
R8: Ch 3, dc in same st, *dc in next 6 sts, 2 dc in next st; rep from * around, join (96 dc).
R9-10: Ch 3, dc in each st around, join (96 dc).
Do not fasten off. Change to Color B.
Band (Color B)
R11: Ch 3, *fpdc around next st, bpdc around next st; rep from * around, join (96 sts).
R12-16: Ch 3, *fpdc around next st, bpdc around next st; rep from * around, join (96 sts).
Fasten off Color B.
Lunar Module Button (Color B)
R1: MR, 6 sc (6 sc).
R2: Inc in each st around (12 sc).
R3: *Sc in next st, inc in next st; rep from * around (18 sc).
R4: Sc in each st around (18 sc).
R5: *Sc in next st, dec; rep from * around (12 sc).
Stuff lightly.
R6: Dec around (6 sc).
Fasten off, leaving a long tail. Sew the opening closed.
Optional Edging (Color B)
Join Color B with a sl st to any stitch of the band, ch 1, sc in each st around, join with sl st. Fasten off.
Assembly and Finishing
Sew the lunar module button to the center of the beret circle using the long Color B tail, making sure it sits flat and secure. Weave in all ends neatly on the wrong side. Block the beret lightly by misting it with water and shaping it over a small bowl or rounded form, then let it dry completely to even out the ribbing and give the crown a crisp, flat finish.
Pro Tips and Variations
- Swap the sage green for a deep navy or charcoal for a more classic beret look, keeping the cream band and button for contrast.
- Add a second small button or a tiny embroidered star near the crown for extra space-themed charm.
- Work the band one or two rounds taller for a slouchier fit on dogs with longer ears or a larger head.