Lemon Drop Crochet Bath Mitt Free Pattern
Introduction
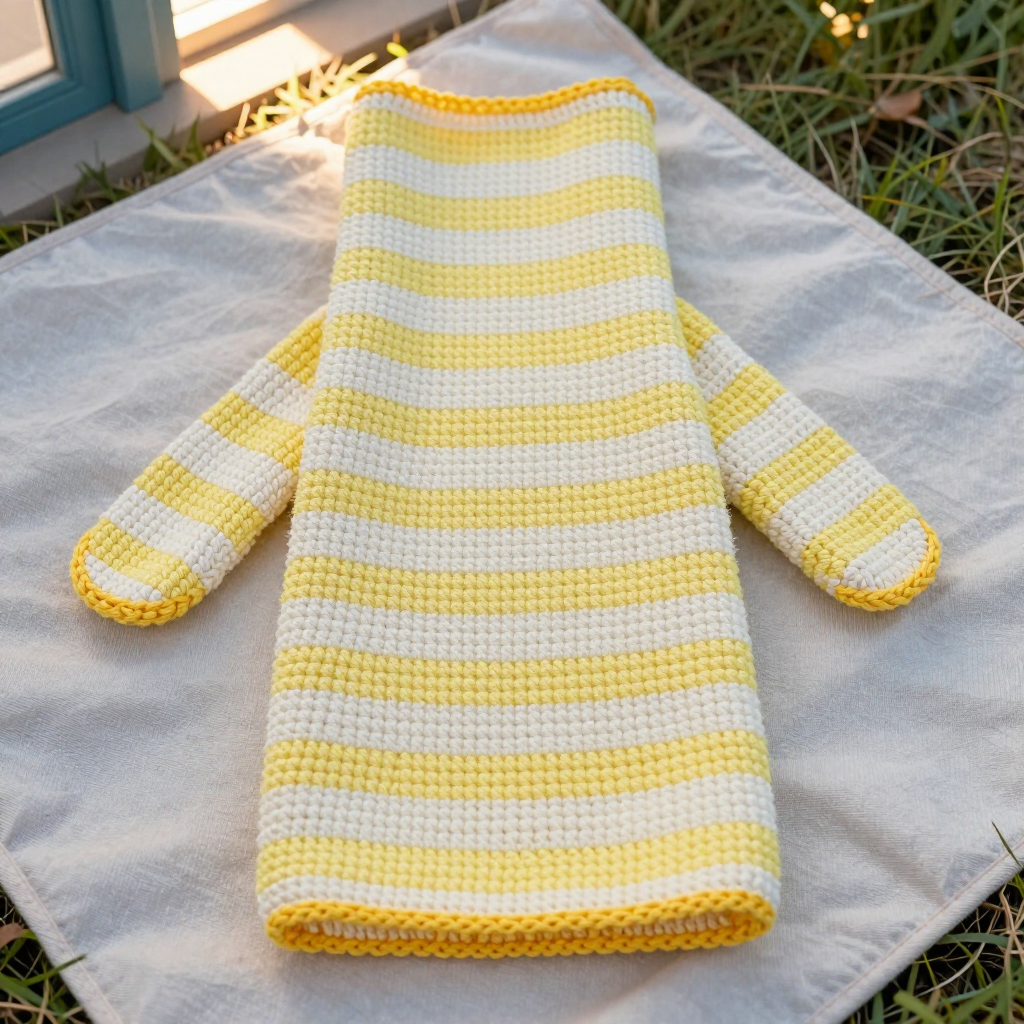
The Lemon Drop Crochet Bath Mitt is a sweet little spa project that anyone who can single crochet can make. It is worked as one simple tube in joined rounds, then folded flat and seamed into a soft mitt with a handy thumb gap. Pastel lemon and cream stripes give it a fresh, sunny look, and the cotton yarn feels gentle and absorbent against the skin. It is perfect for a beginner's first wearable-style project, a quick gift, or a matching bath set with your favorite washcloth.
Materials Needed
- Yarn: Worsted (4) medium weight, 100% cotton. Color A (pastel lemon yellow): approx 90 yd. Color B (cream): approx 60 yd.
- Hook: 5 mm (H/8) crochet hook
- Notions: Stitch marker, yarn needle (tapestry needle), scissors, and a removable stitch marker or scrap yarn for marking the thumb gap
- Finished size: Approx 4.5 in (11.5 cm) wide flat x 8.5 in (21.5 cm) long; fits an average adult hand
Abbreviations
- ch – chain: make a loop of yarn and pull it through the loop on your hook.
- sc – single crochet: insert hook, yarn over, pull up a loop, yarn over, pull through both loops.
- sl st – slip stitch: insert hook, yarn over, pull through both the stitch and the loop on your hook.
- st(s) – stitch(es)
- rnd(s) – round(s)
- R – round (R1 = Round 1)
- inc – increase (not used in this pattern, but listed for clarity if you adapt it)
Gauge
14 sts x 16 rows = 4 in (10 cm) in single crochet worked in the round. To check, work a small swatch in joined rounds of sc and measure a 4 in (10 cm) section; adjust your hook size if needed.
Tips Before You Start
- Keep your beginning chain untwisted when you join into a ring, or the tube will spiral.
- Carry the unused color up inside the tube instead of cutting it each time; this keeps the inside tidy and saves yarn.
- The ch 1 at the start of each round does not count as a stitch, so always place your first sc in the same stitch as the join.
- Mark the thumb gap points before seaming so you do not accidentally close the opening.
Step-by-Step Instructions
Notes: Worked in the round as an open tube, then folded flat and seamed. Ch 1 at the start of each round does not count as a st; join each round with a sl st to the first sc. Carry the unused color up inside the tube.
Tube (A = lemon, B = cream)
With A, ch 32. Join with a sl st to the first ch, being careful not to twist (32 sts).
R1: Ch 1, sc in each ch around, join (32 sts).
R2–4: Ch 1, sc in each st around, join (32 sts). Change to B.
R5–8: With B, ch 1, sc in each st around, join (32 sts). Change to A.
R9–12: With A, ch 1, sc in each st around, join (32 sts). Change to B.
R13–16: With B, ch 1, sc in each st around, join (32 sts). Change to A.
R17–20: With A, ch 1, sc in each st around, join (32 sts). Change to B.
R21–24: With B, ch 1, sc in each st around, join (32 sts). Change to A.
R25–28: With A, ch 1, sc in each st around, join (32 sts). Change to B.
R29–32: With B, ch 1, sc in each st around, join (32 sts). Change to A.
R33–34: With A, ch 1, sc in each st around, join (32 sts). Fasten off, leaving a 24 in tail for seaming.
Thumb Gap Marking
Fold the tube flat so the join runs along one side edge. The open end at R34 is the fingertip end; the R1 end is the wrist.
Measure 1.5 in (approx 6 rows) up from the wrist end along the folded side edge and mark this point. Measure 1.75 in (approx 7 sts) further up and mark the second point. This marked span on ONE folded edge is the thumb gap; the opposite folded edge is seamed closed full length.
Assembly
With right sides together, whipstitch or sl st seam the full length of one folded edge from wrist (R1) to fingertip (R34).
On the opposite folded edge, seam from the wrist (R1) up to the first thumb mark, skip the marked thumb gap (approx 7 sts / 1.75 in), then seam from the second mark to the fingertip (R34). Weave in ends.
Edging (Optional, A)
With A, join yarn at the wrist opening.
R1: Ch 1, sc evenly around the wrist opening, join (32 sts).
R2: Ch 1, sc in each st around, join (32 sts). Fasten off.
Repeat the edging around the fingertip opening (sc evenly around, join, fasten off) and around the thumb gap (sc evenly, approx 14 sts around the gap, join, fasten off). Weave in all ends. Turn the mitt right side out and fold flat.
Assembly and Finishing
Seam the folded edges as described above, leaving the thumb gap open on one edge. Weave in all ends on the inside of the mitt. Block lightly by misting with water and patting flat, then let it dry fully before use. Turn right side out and fold flat.
Pro Tips and Variations
- Swap the stripe colors for any two spa-friendly shades, such as sage and white or blush and cream.
- Add a hanging loop of ch 10 at the wrist corner before seaming for easy drying.
- Work the edging in a contrasting color for a crisp, finished border.


