Knit Free Pattern: White Kids Sock with Black Stripe Rings
Introduction
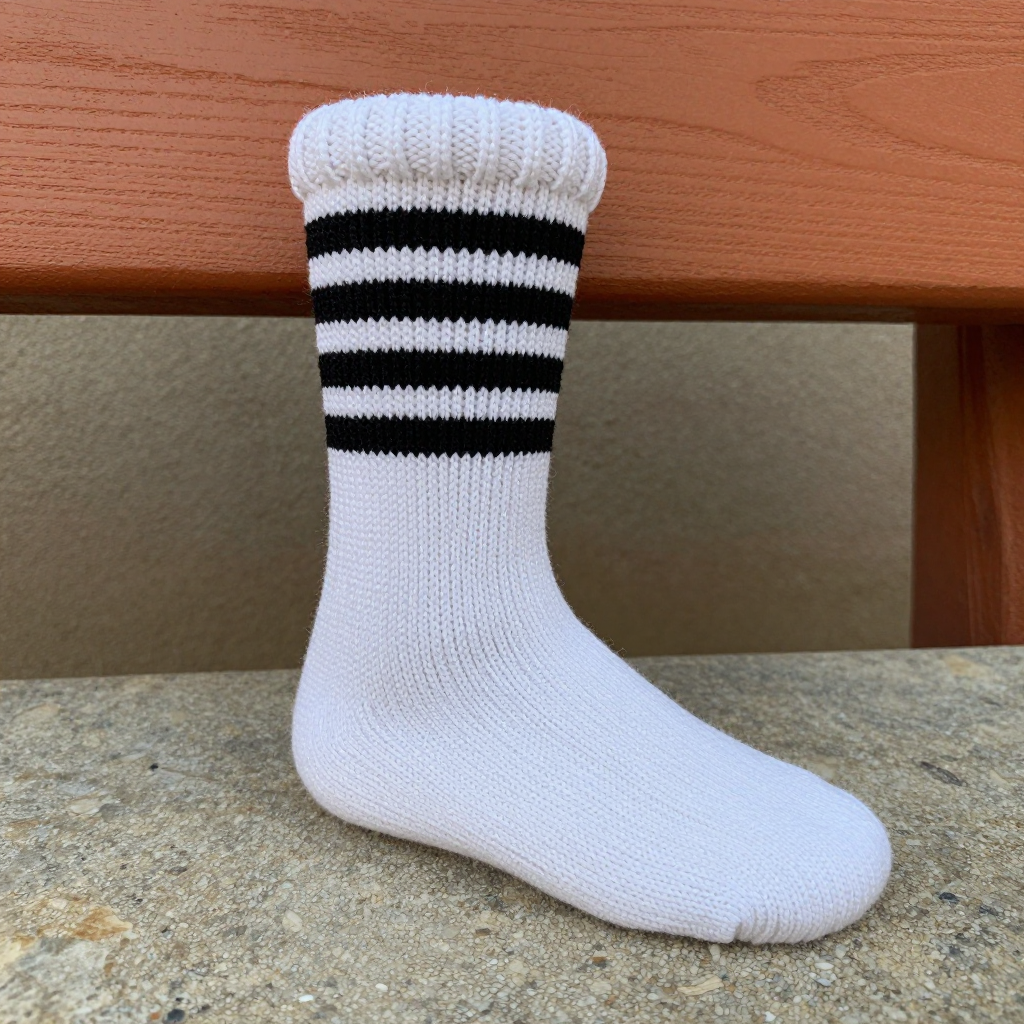
These crisp white kids' socks with thin black stripe rings are the perfect first colorwork project for anyone who has knit a plain sock or two. The stranded work is nothing more than simple round-and-round stripes, so you get that classic black-and-white look without any tricky charts or floats to manage. The all-white stockinette body keeps the sock soft, smooth, and stretchy, while the ribbed cuff hugs the leg and the rounded grafted toe feels comfortable inside little shoes. Worked in fine fingering-weight wool at a firm gauge, they are warm, hard-wearing, and quick enough to finish in a weekend — then you simply make a second one to match.
Materials Needed
- Yarn: Fingering weight (14 wpi / 4-ply) wool, such as 100% superwash merino. Color A (white): approx 120 yd (110 m). Color B (black): approx 15 yd (14 m).
- Needles: 2.25 mm (US 1) set of 5 double-pointed needles, or a 2.25 mm circular needle if you prefer the magic loop method.
- Notions: Stitch marker, tapestry needle for grafting and weaving in ends, tape measure, scissors.
- Finished size: To fit a kids' foot 6–7 in (15–18 cm) long. Leg circumference approx 6 in (15 cm); leg length approx 4.5 in (11.5 cm) from cuff to heel; foot length approx 7 in (18 cm) from heel to toe.
Abbreviations
- CO — cast on: make the starting loops on your needle.
- k — knit stitch.
- p — purl stitch.
- rnd / rnds — round / rounds: one complete circuit of knitting in the round.
- pm — place marker.
- st / sts — stitch / stitches.
- RS / WS — right side / wrong side (the outside / inside of the sock).
- sl1 — slip one stitch purlwise without knitting it.
- k2tog — knit two stitches together (a right-leaning decrease).
- ssk — slip, slip, knit: slip two stitches one at a time knitwise, then knit them together through the back loops (a left-leaning decrease).
- p2tog — purl two stitches together.
Gauge
32 sts and 44 rnds = 4 in (10 cm) in stockinette stitch in the round. Knit a small swatch in the round (or a flat swatch and measure the knit side) and adjust your needle size if needed so your stitch count matches.
Tips Before You Start
- Keep the black floats loose on the stripe rounds — snug floats make the leg too tight to pull over a heel. Stretch the stitches gently on the needle as you change colors.
- Because the stripes are single rounds, carry Color B up the inside of the leg rather than cutting it each time; the short white gaps hide the carried strand neatly.
- Try the sock on (or measure against the foot) before starting the toe — foot length varies, and you want about 0.75 in (2 cm) of growing room before the toe shaping.
- Work the heel flap on the two needles holding half the stitches and keep the instep stitches resting on the remaining needles so they stay clean and even.
Step-by-Step Instructions
Cuff (Color A)
Setup: CO 48 sts. Join in the round, being careful not to twist, and pm for the start of round.
Rnds 1–10: [k1, p1] rib (48 sts).
Leg (Color A and B)
Rnds 11–14: k (48 sts).
Rnd 15: Change to B, k (48 sts).
Rnds 16–18: Change to A, k (48 sts).
Rnd 19: Change to B, k (48 sts).
Rnds 20–22: Change to A, k (48 sts).
Rnd 23: Change to B, k (48 sts).
Rnds 24–27: Change to A, k (48 sts). Leg measures approx 4.5 in (11.5 cm) from cast-on.
Heel Flap (Color A)
Work back and forth on 24 sts (needles 1 and 2) only.
Row 1 (RS): [sl1, k1] to end.
Row 2 (WS): sl1, p to end.
Rows 3–24: Repeat Rows 1–2 (24 rows worked, ending with a WS row). Heel flap measures approx 2.25 in (5.5 cm).
Heel Turn (Color A)
Row 1 (RS): sl1, k13, ssk, k1, turn.
Row 2 (WS): sl1, p5, p2tog, p1, turn.
Row 3: sl1, k to 1 st before gap, ssk, k1, turn.
Row 4: sl1, p to 1 st before gap, p2tog, p1, turn.
Repeat Rows 3–4 until all 24 heel sts are worked (14 sts rem).
Gusset (Color A)
Setup: K across 14 heel sts (needle 1). Pick up and k 12 sts along left heel flap (needle 2). K 24 instep sts (needle 3). Pick up and k 12 sts along right heel flap (needle 4). K 7 heel sts onto needle 4 (68 sts).
Rnd 1: k to last 3 sts on needle 2, k2tog, k1; k across needle 3; k1, ssk, k to end on needle 4.
Rnd 2: k.
Repeat Rnds 1–2 until 48 sts rem.
Foot (Color A)
All rnds: k every rnd until foot measures approx 6.25 in (16 cm) from back of heel, or 0.75 in (2 cm) less than desired finished foot length (48 sts).
Toe Stripe (Color B)
Rnd 1: Change to B, k (48 sts). Change to A.
Toe Shaping (Color A)
Rnd 1: [k to last 3 sts on needle 1, k2tog, k1; k1, ssk, k to end on needle 2; k to last 3 sts on needle 3, k2tog, k1; k1, ssk, k to end on needle 4] (44 sts).
Rnd 2: k (44 sts).
Repeat Rnds 1–2 until 24 sts rem, then repeat Rnd 1 every rnd until 8 sts rem.
Assembly and Finishing
Graft the remaining 8 toe stitches together with Kitchener stitch for a smooth, rounded toe. Weave in all ends on the wrong side, taking care to secure the black stripe ends so they don't work loose with wear. Block lightly by dampening the sock and patting it into shape flat, or slip it over a sock blocker, then let it dry completely. Make the second sock identical.
Pro Tips and Variations
- Change the stripe color: Swap the black for navy, red, or a bright contrast to suit the wearer — the single-round stripes work in any color.
- Add more rings: Work an extra single-round stripe between the existing ones for a bolder look, keeping the white bands at least 2 rounds wide.
- Size up: For a larger child, add 8 stitches (56 sts total) and work the heel on 28 sts, adjusting foot length to the wearer's measurement.


