Harvest Stripe House Slippers: Free Knit Pattern
Introduction
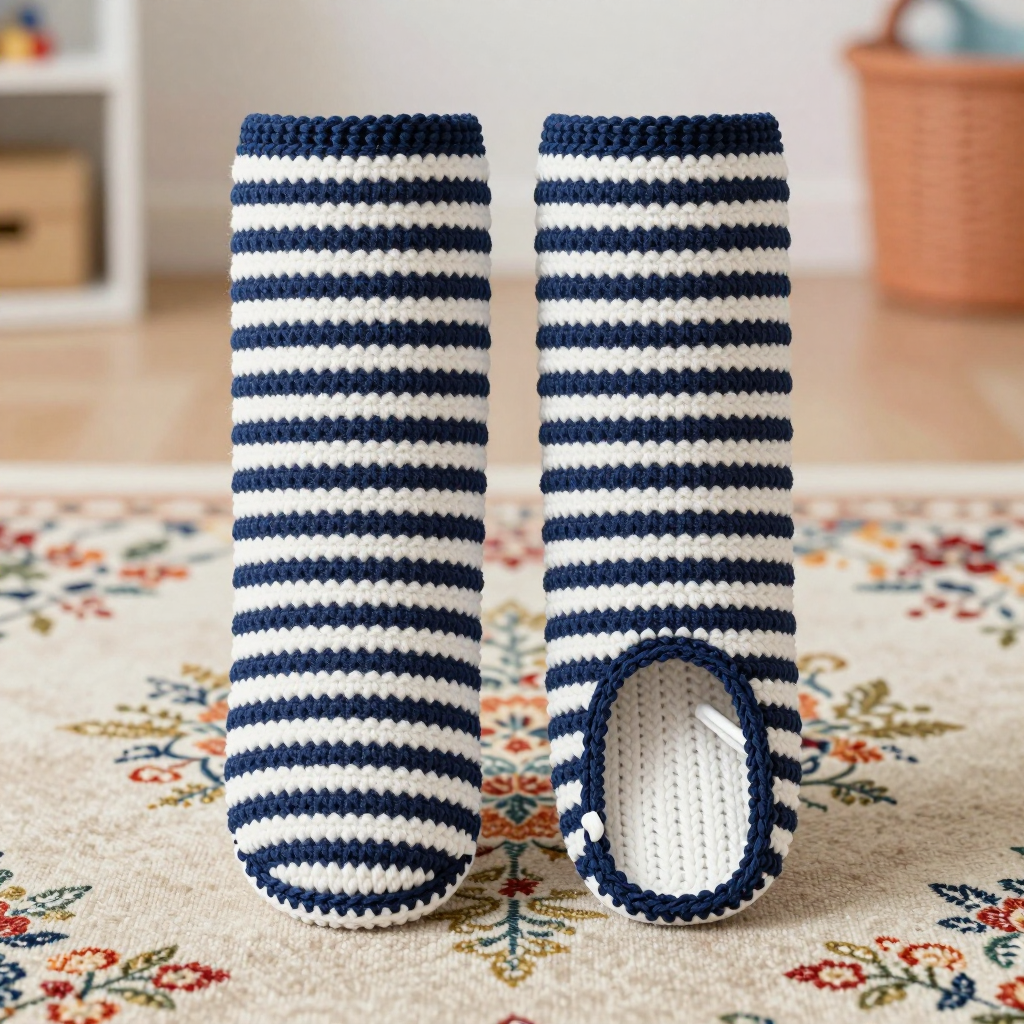
These Harvest Stripe House Slippers are the perfect first project for anyone who has just learned to knit and purl. Each slipper is simply a straight seed-stitch tube knit flat in alternating navy and white stripes, then folded and sewn closed at both ends for a snug, cozy fit. The seed stitch gives the fabric a lovely bumpy texture that feels warm and squishy underfoot, while the bold two-row stripes make the finished pair look far more complicated than it really is. A small white seed-stitch pull tab at the heel adds a subtle Western-inspired detail and helps you tug the slippers on with ease. If you can cast on, knit, purl, and bind off, you can make these.
Materials Needed
- Yarn: Fingering weight wool. Approximately 200 yards navy and 100 yards white for the pair (about 100 yards navy and 50 yards white per slipper).
- Needles: 3.25 mm (US 3) straight knitting needles.
- Notions: Tapestry needle for seaming and weaving in ends, a spare needle or stitch holder for picking up the heel tab, scissors, and a tape measure.
- Finished size: Men's medium — foot length 10 inches, width 4 inches.
Abbreviations
- st(s): stitch(es)
- k: knit — insert the needle into the stitch and pull a loop of yarn through.
- p: purl — insert the needle into the stitch from front to back and pull a loop of yarn through the other way.
- RS: right side — the outside of the finished slipper.
- BO: bind off — finish the edge so the stitches don't unravel.
Gauge
24 stitches and 36 rows = 4 inches in seed stitch. Knit a small swatch in seed stitch and measure a 4-inch section; if you have more stitches than 24, go up a needle size, and if you have fewer, go down.
Tips Before You Start
- Keep your stripes tidy: change colors at the beginning of a row and give the yarn a gentle tug so the first stitch of the new color sits snugly against the old one. Carry the unused color loosely up the side edge rather than cutting it each time.
- Seed stitch needs attention: always knit the purl stitches and purl the knit stitches as they appear. If you lose your place, look at the bump (purl) or V (knit) below the stitch on your needle.
- Measure as you go: the tube must reach 10 inches from the cast-on edge, so check the length before you bind off rather than counting rows alone.
- Make both slippers the same: knit the second slipper to the same stripe count as the first so the pair matches exactly.
Step-by-Step Instructions
Slipper Body (make 2)
Row 1 (RS): With navy, cast on 48 sts. Work seed stitch: [k1, p1] across, ending with p1 (48 sts).
Row 2: [p1, k1] across, ending with k1 (48 sts).
Rows 3-4: Change to white and work 2 rows in seed stitch, matching the stitch pattern as it appears (48 sts).
Rows 5-6: Change to navy and work 2 rows in seed stitch (48 sts).
Rows 7-8: Change to white and work 2 rows in seed stitch (48 sts).
Stripe pattern: Continue alternating 2 rows navy and 2 rows white in seed stitch, repeating the 4-row color sequence until the piece measures 10 inches from the cast-on edge, ending with a navy stripe (48 sts).
Final row: Bind off all 48 sts.
Heel Tab (make 2, one per slipper)
Row 1 (RS): With white, pick up 6 sts evenly along the heel opening edge. Work seed stitch: [k1, p1] across (6 sts).
Row 2: [p1, k1] across (6 sts).
Rows 3-4: Repeat Rows 1-2 in seed stitch (6 sts).
Final row: Bind off all 6 sts.
Assembly and Finishing
Fold one slipper piece in half lengthwise with right sides together. Using the tapestry needle and navy yarn, sew the long side edges together, but leave a 2-inch opening at the heel for foot insertion. Sew one end completely closed to form the toe. Turn the slipper right side out. Take the bound-off end of the white heel tab and sew it to the opposite side of the heel opening to create a small pull loop. Repeat for the second slipper. Weave in all ends on the wrong side, then block lightly by misting with water and shaping flat to dry — do not stretch the seed stitch, just smooth it into shape.
Pro Tips and Variations
- Change the palette: swap navy and white for any two contrasting colors — rust and cream give a warm autumn look, while charcoal and mustard feel more modern.
- Add grip: sew a few small dots of puffy fabric paint or attach a non-slip sole patch to the bottom for extra traction on smooth floors.
- Adjust the fit: for a wider slipper, cast on in multiples of 2 (seed stitch needs an even count); for a longer foot, simply keep striping until the tube reaches your desired length before binding off.