Garter Mug Patch Baby Blanket Free Knit Pattern
Introduction
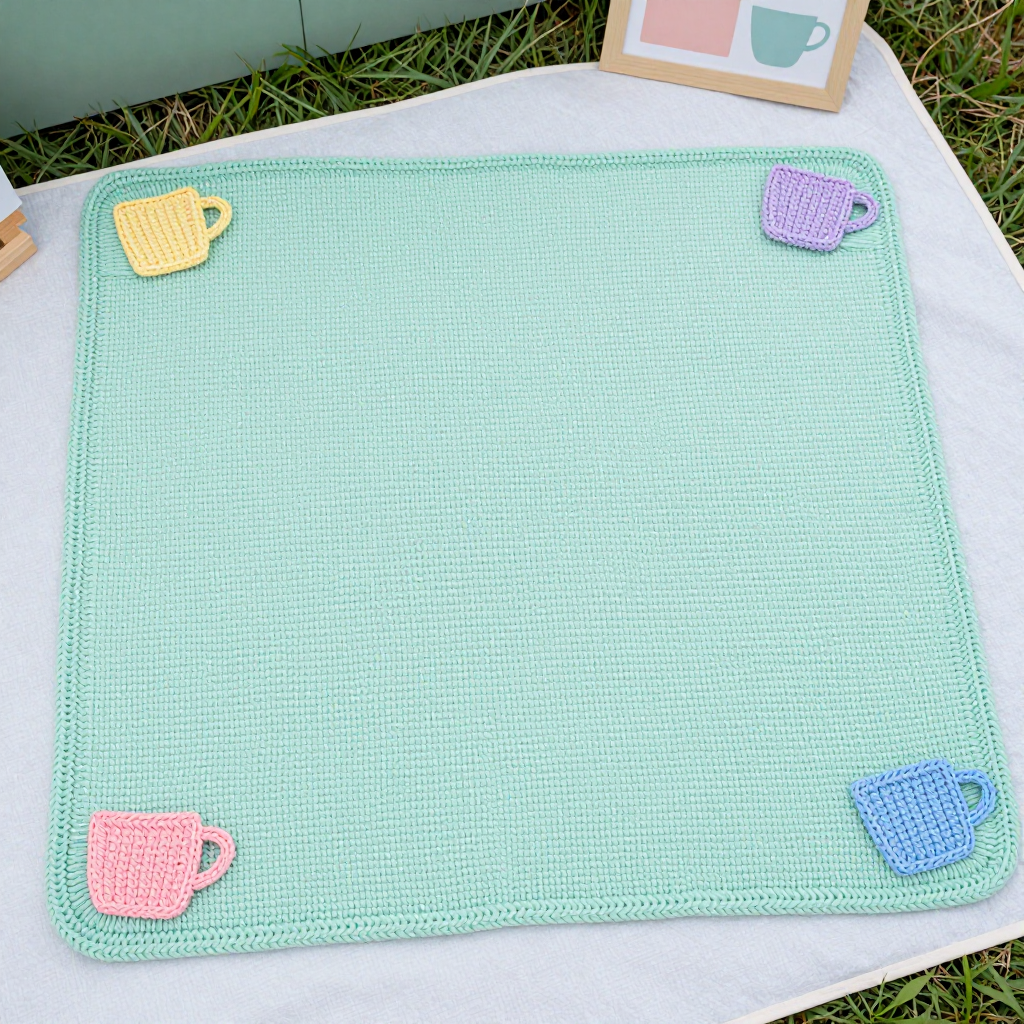
This Garter Mug Patch Baby Blanket is a sweet, beginner-friendly project for anyone who has just learned to knit and purl—or who simply wants a soothing, no-fuss knit. It's a simple garter-stitch square worked in one pastel mint base color, finished with four tiny coffee-cup appliqués in candy shades, one tucked near each corner like little patches. Knit in chenille plush yarn, it comes out wonderfully soft, squishy, and cozy—perfect for wrapping up a baby or gifting to a new parent. The ridged garter texture gives it a gentle, handmade look, while the whimsical mugs add just enough charm to make it special.
Materials Needed
- Yarn: Chenille plush yarn (super bulky, weight category 6), 100% polyester, approximately 300 yards total.
- Main color (A): 250 yards pastel mint
- Contrast colors for appliqués: 15 yards each of pastel pink (B), pastel yellow (C), pastel lavender (D), and pastel blue (E)
- Needles: US 11 (8.0 mm) knitting needles
- Notions: Tapestry needle, scissors, stitch markers (optional), measuring tape
- Finished size: Approximately 30 inches x 30 inches (76 cm x 76 cm)
Abbreviations
- CO – cast on: create the starting stitches on your needle
- BO – bind off: finish the edge so the stitches don't unravel
- st(s) – stitch(es)
- k – knit stitch
- k2tog – knit two stitches together (decreases by one stitch)
- k3tog – knit three stitches together (decreases by two stitches)
- garter st – garter stitch: knit every row
- in – inch(es)
Gauge
8 stitches and 16 rows = 4 inches in garter stitch. To check, knit a small swatch in garter stitch, block it lightly, and measure a 4-inch section—adjust your needle size if needed to match.
Tips Before You Start
- Chenille yarn can shed and slip, so keep your tension relaxed and avoid pulling tight—loose, even stitches keep the plush texture soft.
- Count your stitches after every few rows; garter stitch is forgiving, but a quick count keeps the square even.
- Make all four appliqués first so you can lay them out and balance the corners before sewing.
- Bind off loosely on the blanket and the border so the edges stay stretchy and don't pucker.
Step-by-Step Instructions
Blanket (Color A)
Row 1: CO 60 sts (60 sts).
Rows 2-120: Knit every row in garter stitch until the piece measures 30 in (approximately 120 rows total) (60 sts).
Final row: BO loosely (60 sts bound off). Weave in ends.
Coffee Cup Appliqué (make 4, one each in B, C, D, E)
Row 1: With your chosen color, CO 7 sts (7 sts).
Rows 2-7: Knit every row in garter stitch (6 rows total) (7 sts).
Row 8: k2tog, k3, k2tog (5 sts).
Row 9: k2tog, k1, k2tog (3 sts).
Row 10: k3tog (1 st).
Fasten off.
Handle (one per cup, in the same color as that cup)
Row 1: With the same color, pick up 3 sts along one side of the cup (3 sts).
Rows 2-5: Knit every row (4 rows total) (3 sts).
Final row: BO (3 sts bound off). Repeat for the other side if desired.
Edging (Color A)
Set-up: With A, pick up and knit stitches around the entire blanket edge—approximately 3 sts for every 4 rows along the sides, and 1 st per cast-on/bound-off stitch along the top and bottom (about 240 sts total).
Rnds 1-3: Knit every round (3 rounds total) (about 240 sts).
Final rnd: BO loosely (about 240 sts bound off).
Assembly and Finishing
Block the blanket lightly to even out the garter ridges and smooth the edges. Place one coffee-cup appliqué at each corner, about 2 inches in from the edges, and arrange the colors so they feel balanced. Using matching yarn and a tapestry needle, sew each appliqué flat in place with small, secure stitches. Weave in all remaining ends, then give the blanket a final light block and let it dry completely before use.
Pro Tips and Variations
- Swap the pastel palette for any four colors you love—team colors, nursery shades, or bold brights all work beautifully.
- Add a second handle to each cup for a more symmetrical mug shape, or leave one side plain for a simpler look.
- For a larger blanket, cast on more stitches in multiples that keep the square even, and add extra rows to match the new width.