Denim Mosaic Drawstring Backpack Free Knit Pattern
Introduction
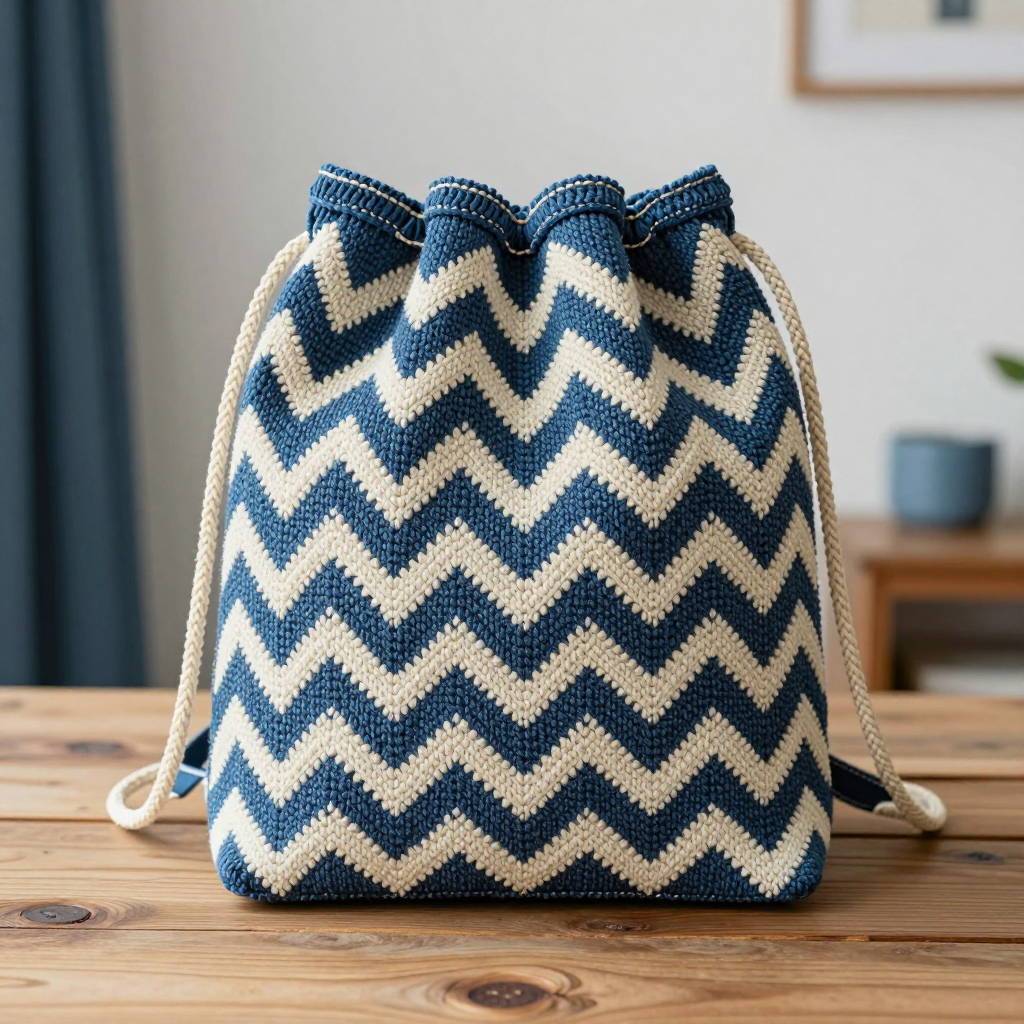
This denim mosaic drawstring backpack is the perfect first colorwork project for anyone who has mastered knit and purl and wants to try something a little more eye-catching. Worked flat in worsted-weight cotton, the body uses simple mosaic slip-stitch knitting to create crisp cream zigzags on a denim blue background, so you only ever work with one color per row. The finished bag is a neat 10 by 12 inches, sturdy enough for everyday errands, and the cream drawstring cord doubles as shoulder straps for a retro, 90s-inspired look. It feels soft but firm in the hand, holds its shape well, and comes together with just two seams and a folded base.
Materials Needed
- Yarn: Worsted weight cotton (100% cotton; 100 g / 200 yd per skein). Color A (denim blue): 2 skeins, approx. 250 yd. Color B (cream): 1 skein, approx. 100 yd.
- Needles: 4.5 mm (US 7) straight needles, or size needed to obtain gauge.
- Notions: Tapestry needle, stitch markers (optional), tape measure, scissors.
- Finished size: Approx. 10 inches (25.5 cm) wide x 12 inches (30.5 cm) tall, excluding the drawstring.
Abbreviations
- CO — cast on: make the starting loops on your needle.
- BO — bind off: finish the edge so stitches don't unravel.
- st(s) — stitch(es).
- k — knit stitch.
- p — purl stitch.
- sl — slip: move a stitch from the left needle to the right needle without working it.
- wyib — with yarn in back (hold the working yarn behind your work).
- wyif — with yarn in front (hold the working yarn in front of your work).
- RS / WS — right side (public side) / wrong side (inside).
- rep — repeat.
- rnd(s) — round(s).
Gauge
18 sts and 36 rows = 4 inches (10 cm) in the mosaic pattern, blocked. Knit a swatch in the mosaic pattern, block it, and measure a 4-inch section; if you have more stitches, go up a needle size, and if you have fewer, go down.
Tips Before You Start
- In mosaic knitting you work only one color per row. Carry the unused color loosely up the side edge rather than cutting it, and keep those floats relaxed so the fabric doesn't pucker.
- Always slip stitches purlwise (as if to purl) unless your chart tells you otherwise — this keeps the slipped stitches sitting flat and neat.
- Count your stitches at the end of every right-side row; the 90-stitch count should never change across the whole panel.
- Cotton has little stretch, so seam with a light hand and block gently to measurements rather than tugging the fabric into shape.
Step-by-Step Instructions
Backpack Panel (worked flat)
Row 1 (RS): With A, CO 90 sts.
Rows 2-3: Knit 2 rows in garter stitch (90 sts).
Set mosaic pattern: Work Chart A (zigzag) as follows. On every row, knit the first and last stitch of the row in A to keep a tidy edge, and slip the charted stitches as indicated (slip purlwise, carrying the yarn across the back on RS rows and across the front on WS rows).
Rows 1-12: Follow Chart A, slipping stitches as indicated (90 sts).
Rows 13-24: Rep Rows 1-12 of Chart A (90 sts).
Continue repeating Rows 1-12 of Chart A until the piece measures 24 inches (61 cm) from the cast-on edge, ending after a WS row. You will have worked 12-row bands over the full height.
Next 2 rows: With A, knit 2 rows (garter) (90 sts).
Final row: BO loosely with A.
Seaming and Base
Fold the piece in half widthwise so the cast-on and bind-off edges meet at the top, forming a tube. Using mattress stitch, seam both side edges, leaving the top 1 inch (2.5 cm) of each side seam open to form the drawstring channel. Fold the bottom 2 inches (5 cm) of the bag up to the inside and whipstitch it in place to form a flat base.
Top Edging
Rnd 1: With A, pick up and knit 90 sts evenly around the top opening (90 sts).
Rnd 2: Knit (90 sts).
Rnd 3: Knit (90 sts).
Final rnd: BO loosely with A.
Drawstring Cord
With B, make a twisted cord or crochet chain 60 inches (152 cm) long. Thread it through the top channel, leaving the ends long to form shoulder straps. Tie the ends securely.
Assembly and Finishing
Weave in all ends on the wrong side, working them through the back of stitches so they don't show. Check that the side seams are even and the folded base sits flat inside the bag. Block lightly to measurements: mist with water, pat into shape, and lay flat to dry, keeping the drawstring channel open so it doesn't flatten shut.
Pro Tips and Variations
- Swap the cream for a bright contrast color like mustard or coral for a bolder zigzag, or use a self-striping yarn for a surprise effect.
- Add a small button and loop closure at the top center for extra security on the drawstring opening.
- Make a matching mini version by casting on half the stitches and working fewer repeats — perfect as a gift bag or project pouch.


